CloudFormation
Deploy Infrastructure Template using CloudFormation
To get you started quickly, we’ll use CloudFormation to deploy a number of boilerplate infrastructure and service objects. AWS CloudFormation gives you an easy way to model a collection of related AWS and third-party resources, provision them quickly and consistently, and manage them throughout their lifecycles, by treating infrastructure as code. A CloudFormation template describes your desired resources and their dependencies so you can launch and configure them together as a stack. You can use a template to create, update, and delete an entire stack as a single unit, as often as you need to, instead of managing resources individually.
The AWS CloudFormation template we’ll use in this section will create these resources:
- Two Amazon S3 buckets:
RiderPhotoS3Bucketstores the photos uploaded by the riders- A few test images will be copied into the
RiderPhotoS3Bucketbucket ThumbnailS3Bucketstores the resized thumbnails of the rider photos
- One Amazon DynamoDB table
RiderPhotoDDBTablethat stores the metadata of the rider’s photo with rider’s profile - AWS Lambda functions that perform the processing steps
- IAM role
StateMachineRolethat gives the Step Functions state machine to invoke Lambda functions - One AWS StepFunction that contains the starting point for our workflow
- One Amazon SNS Topic that will be used to notify the user of failures
Click on the link for the region you have chosen:
| Region | Code | Launch |
|---|---|---|
| US East (N. Virginia) | us-east-1 |  |
When launching a stack in the following steps, do not change the default values unless explicitly instructed to.
➡️ Step 1: Specifying a template.
The template link above will take you to the “Create stack” page of CloudFormation with some default values populated. Click Next to proceed.

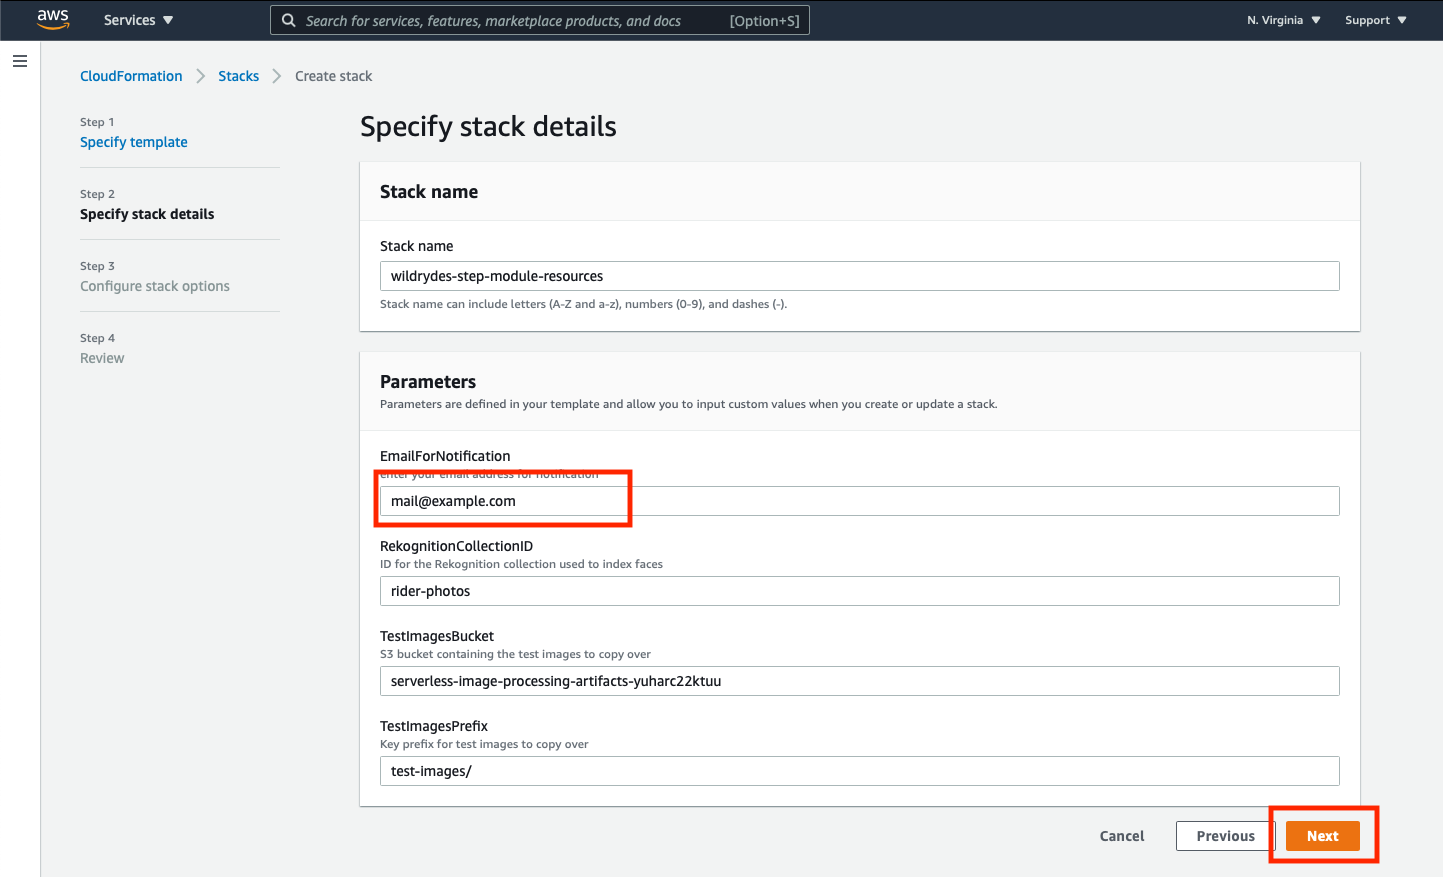
➡️ Step 2: Specify the stack details.
On the “Specify stack details” page, replace the default EmailForNotification parameter to a valid email address that you have access to.
If you do not enter a valid email address, you will not be able to subscribe to the SNS topic or receive notifications throughout the remainder of the workshop.
Click Next to proceed.
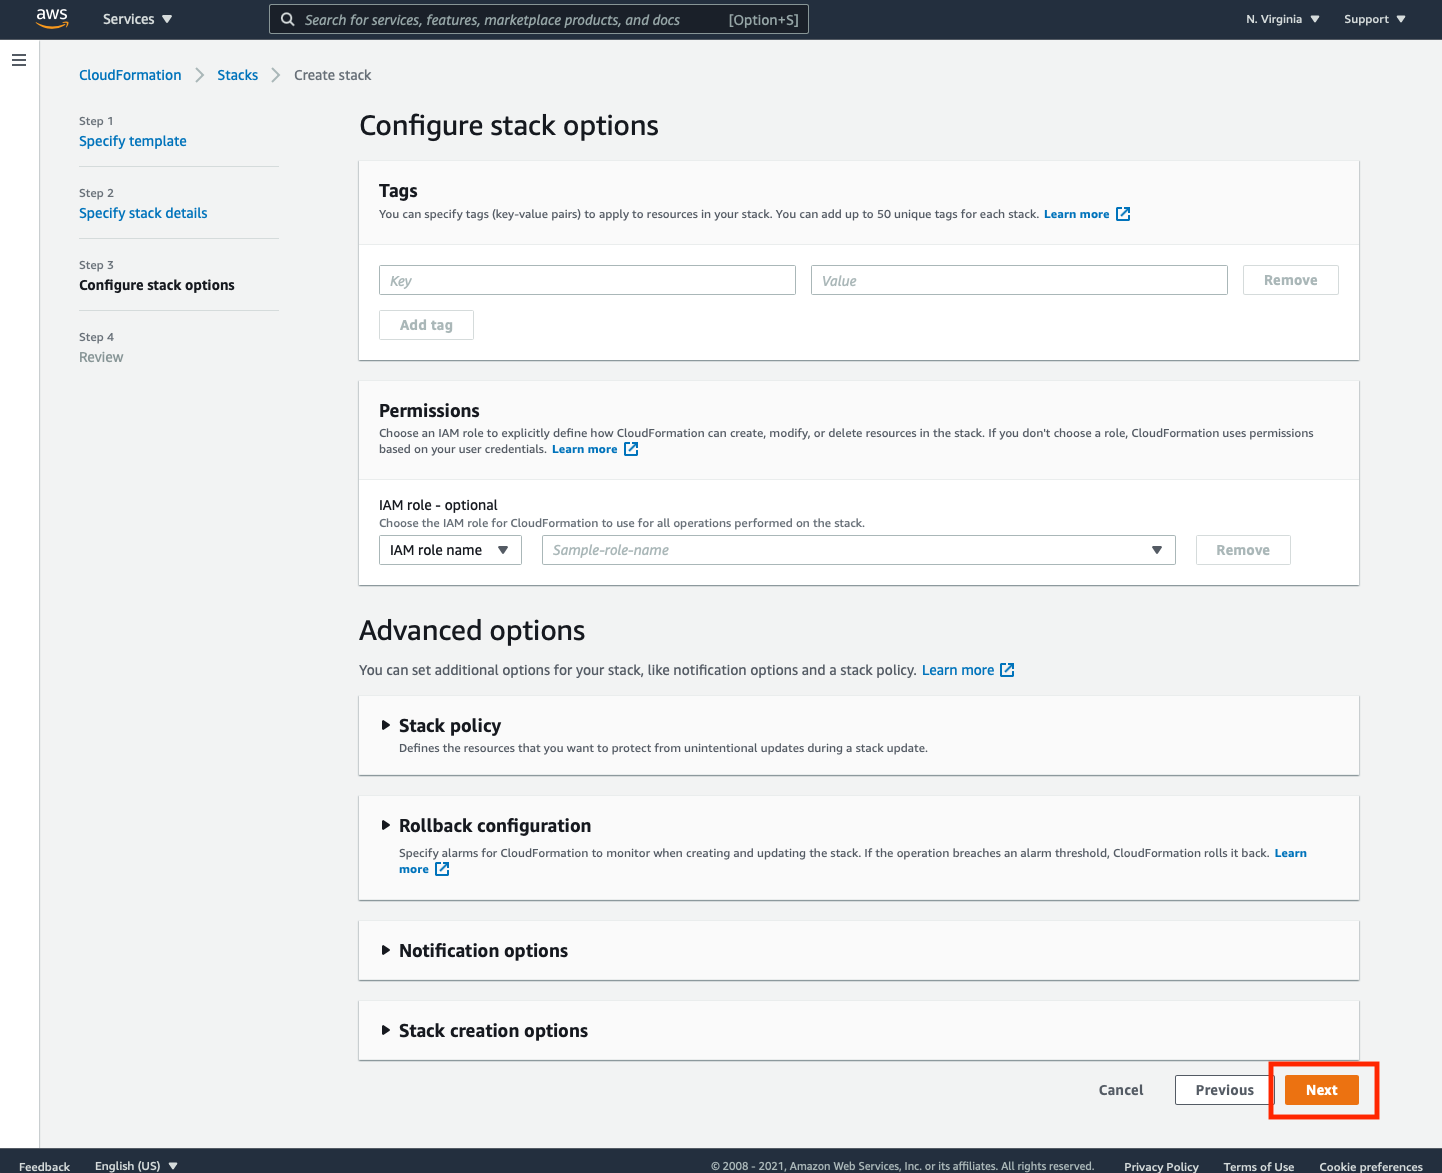
➡️ Step 3: Configure the stack options.
Leave all the default values for the options on the “Configure stack options” page and click Next to continue.
➡️ Step 4: Review the settings and acknowledge the appropriate capabilities.
At the bottom of the page, make sure all of the checkboxes are selected to give AWS CloudFormation the permissions necessary to create the stack.
You must give permissions to (by clicking the check boxes next to):
- create IAM resources
- create IAM resources with custom names
- CAPABILITY_AUTO_EXPAND
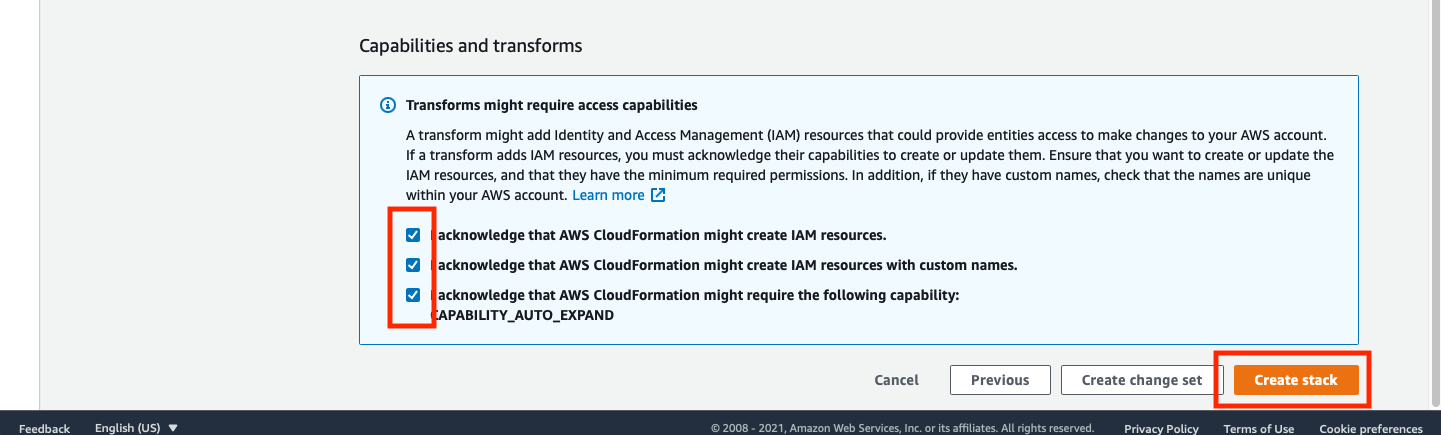
Once all three checkboxes are selected, click Create stack to launch the stack.
➡️ Step 5: Monitor the stack creation process.
Once the stack creation process starts, you’ll see a status screen similar to the following:
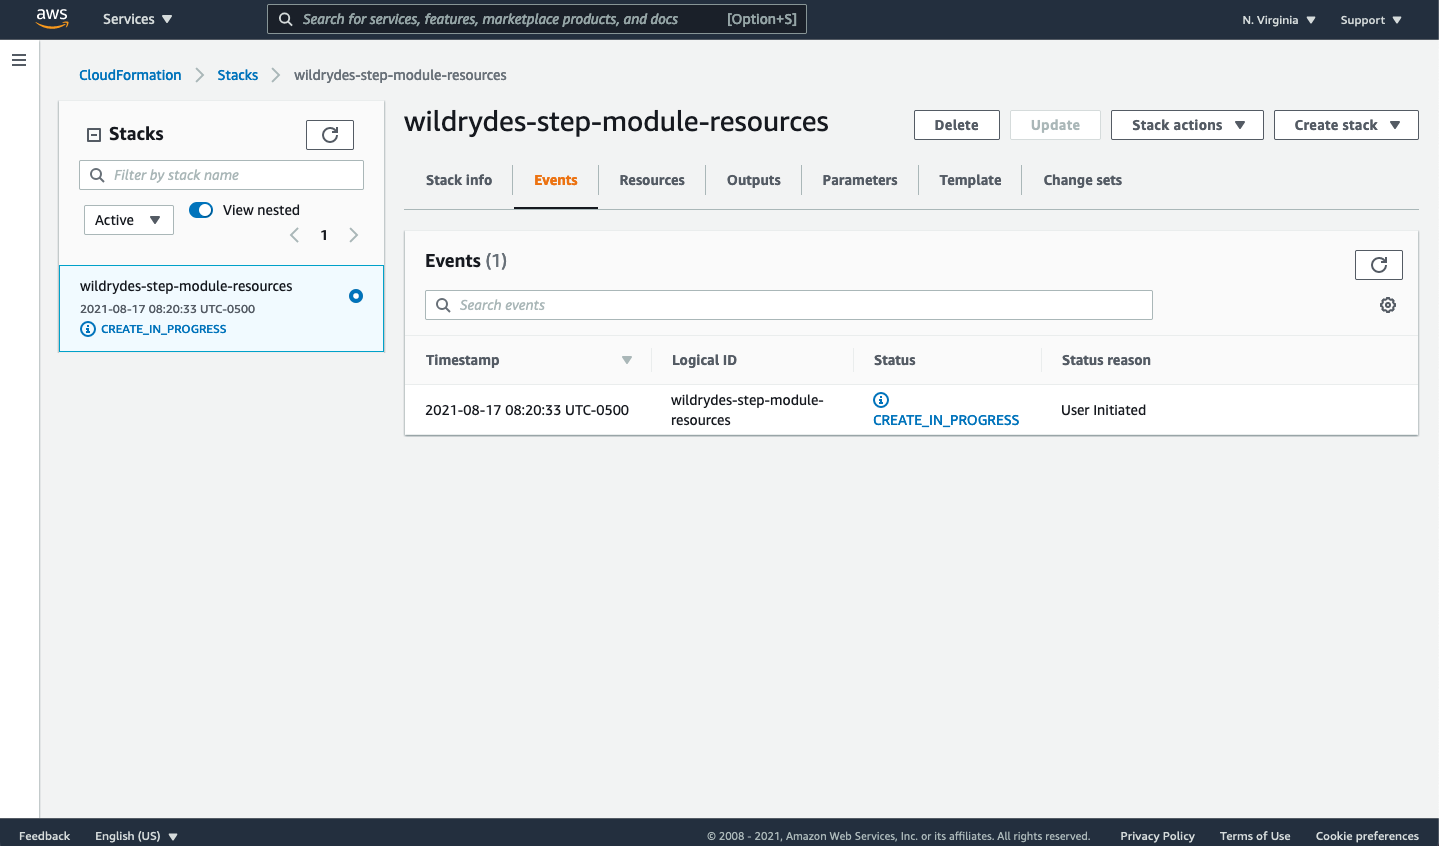
Click the Stack Info tab to the left of the currently selected Events tab. Note that the status of will be CREATE_IN_PROGRESS. This process can take up to 5 minutes to complete. Periodically refresh the page until all stacks show up with the status of CREATE_COMPLETE.

➡️ Step 6: Once the stack creation process is complete is complete, you’ll notice that two stacks have been created: wildrydes-step-module-resources, and a nested stack wildrydes-step-module-resources-ImageMagic-XXXXXXXXX. Click on the stack for wildrydes-step-module-resources and select the Outputs tab to see the resource created by the stack. These resources will be referenced in later steps within this workshop.
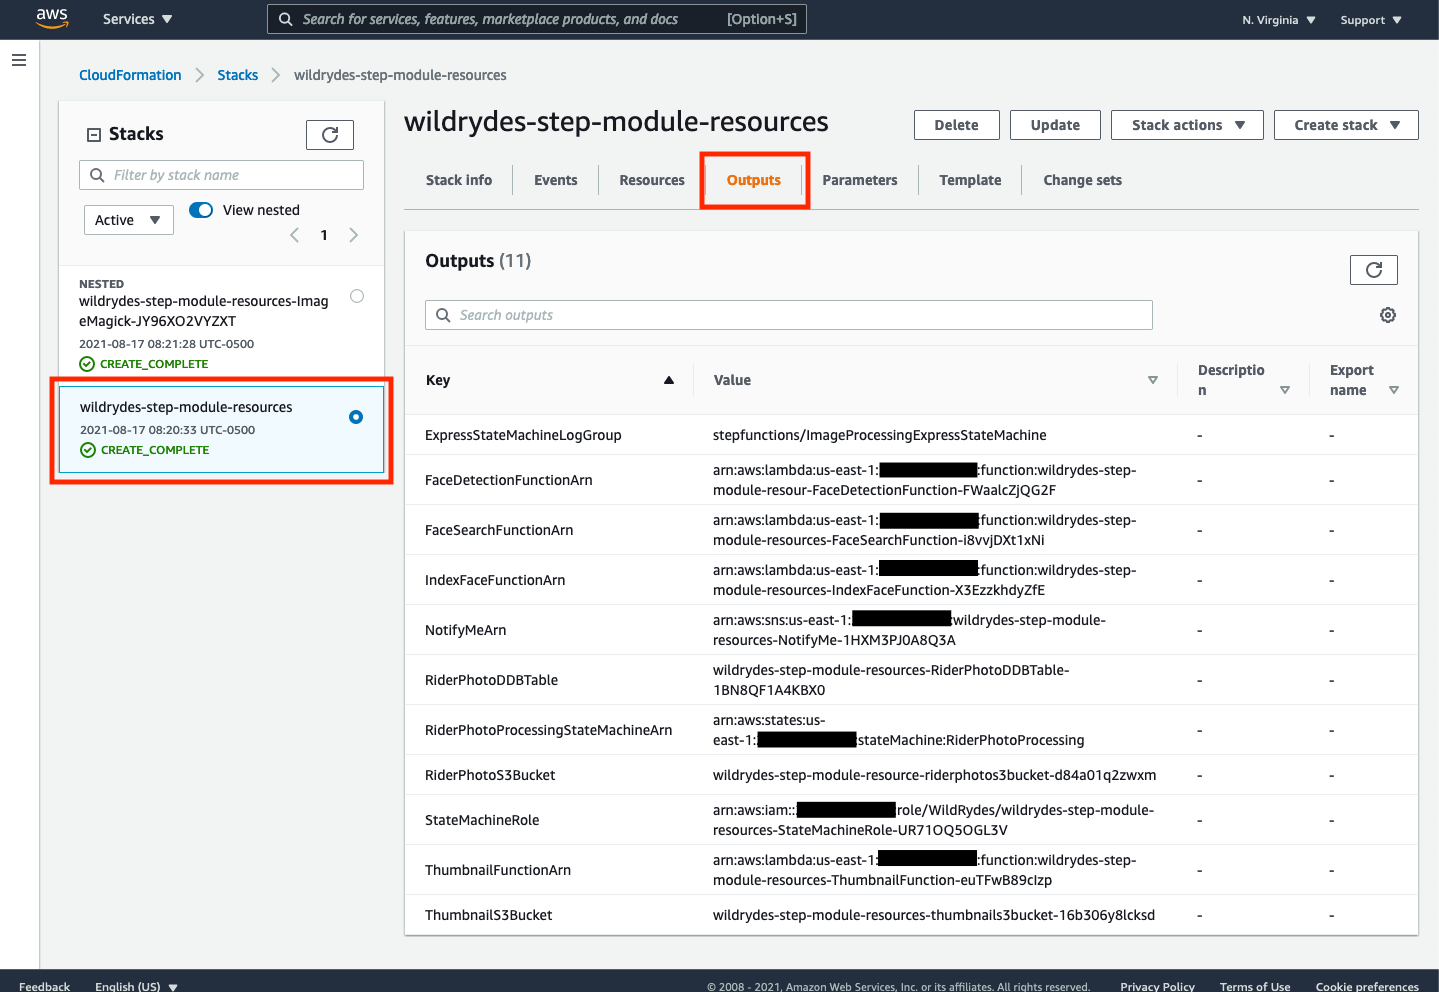
You may want to copy & paste the contents of the “Outputs” tab of the CloudFormation stack to a separate text editor for ease of access later.
Confirm Amazon Simple Notification Service (SNS) subscription
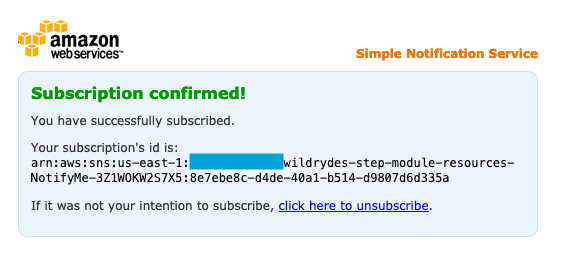
In Step 2 above, you entered an email address to subscribe to an Amazon SNS topic. Check that email account for a message coming from AWS Notifications \<no-reply@sns.amazonaws.com\> with the subject AWS Notification - Subscription Confirmation.
➡️ Step 7: Confirm your subscription by clicking the link contained within the email.

Once confirmed, you’ll see a confirmation message:
✅ Congratulations! You have now deployed the necessary resources needed for this workshop and are now ready to dive in to building out the serverless image processing workflow using AWS Step Functions.