Triggering with Events
We are going to use Amazon EventBridge to execute an AWS Step Functions state machine in response to uploading an image to our Amazon S3 bucket. To accomplish this, we will configure the state machine as a target for an Amazon EventBridge rule.
Creating an Amazon EventBridge Rule
You can now configure S3 Event Notifications to directly deliver to EventBridge. We need to start by creating the EventBridge Rule.
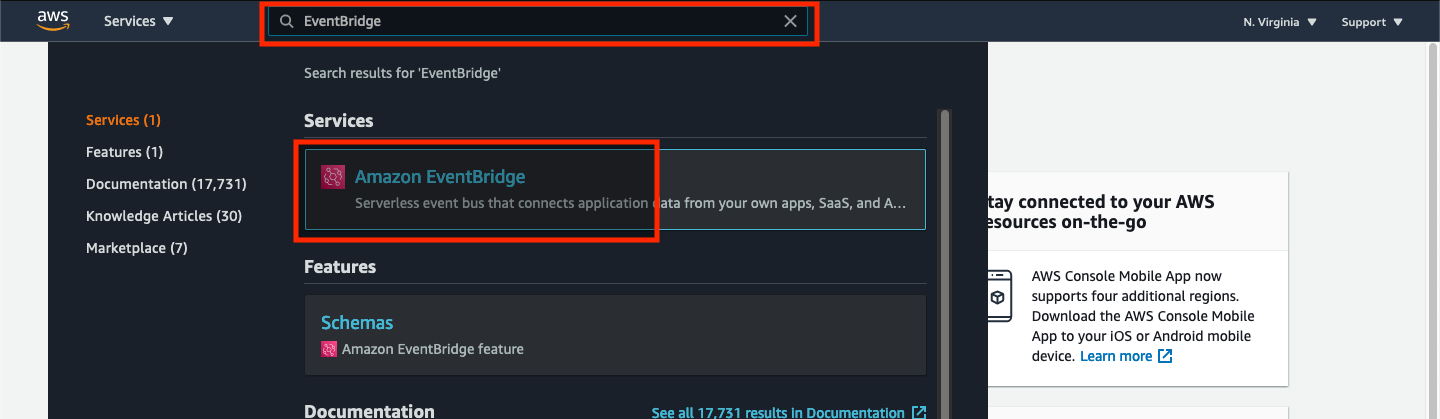
➡️ Step 1: From the AWS Management Console, type “EventBridge” in the search field at the top of the window and select Amazon EventBridge from the list of services.
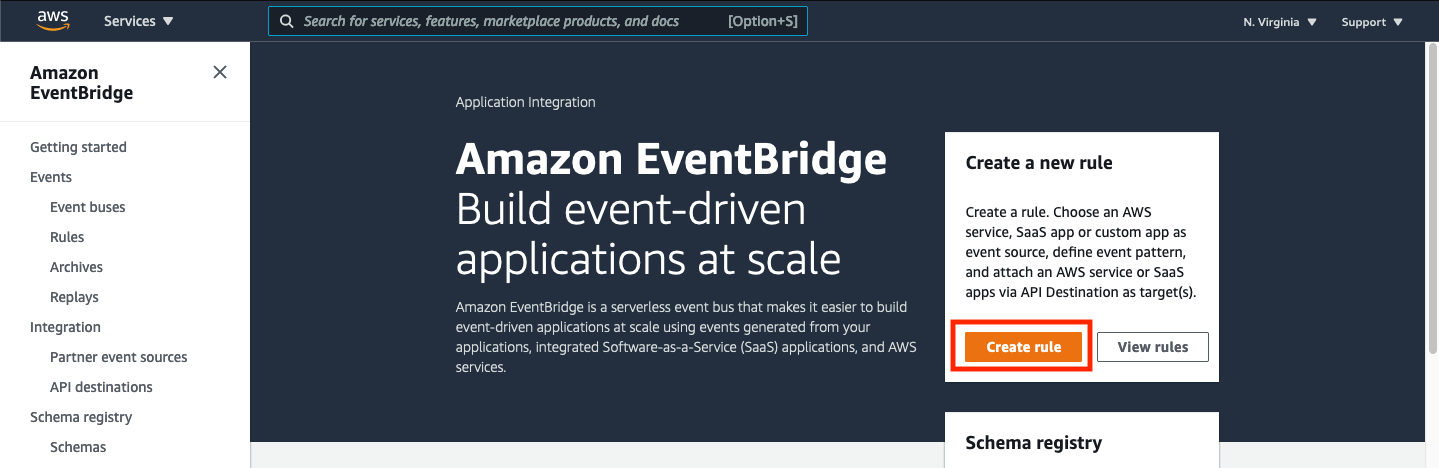
➡️ Step 2: Choose Create rule.
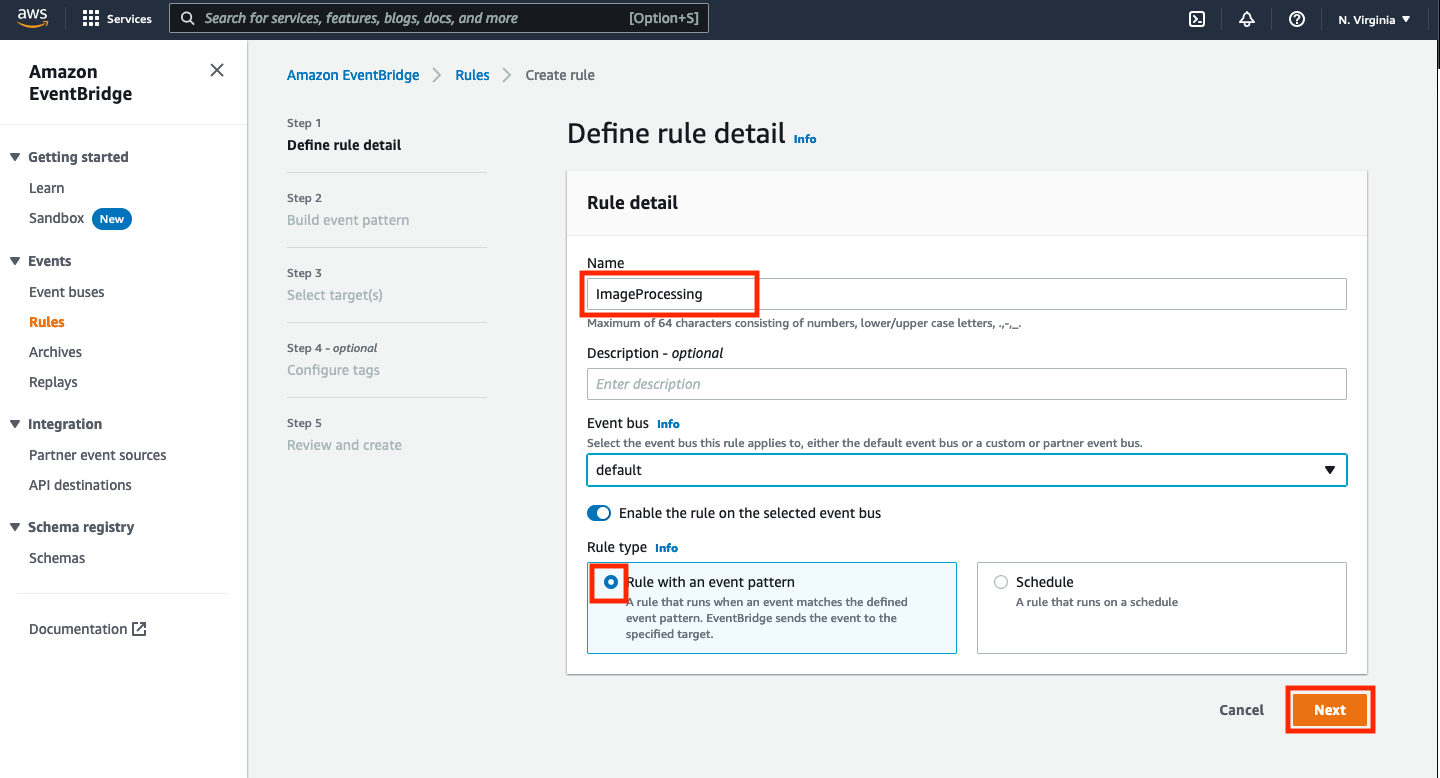
➡️ Step 3: Defining the rule details. Enter ImageProcessing as the Name and choose Rule with an event pattern as the “Rule Type” option. Then click Next.
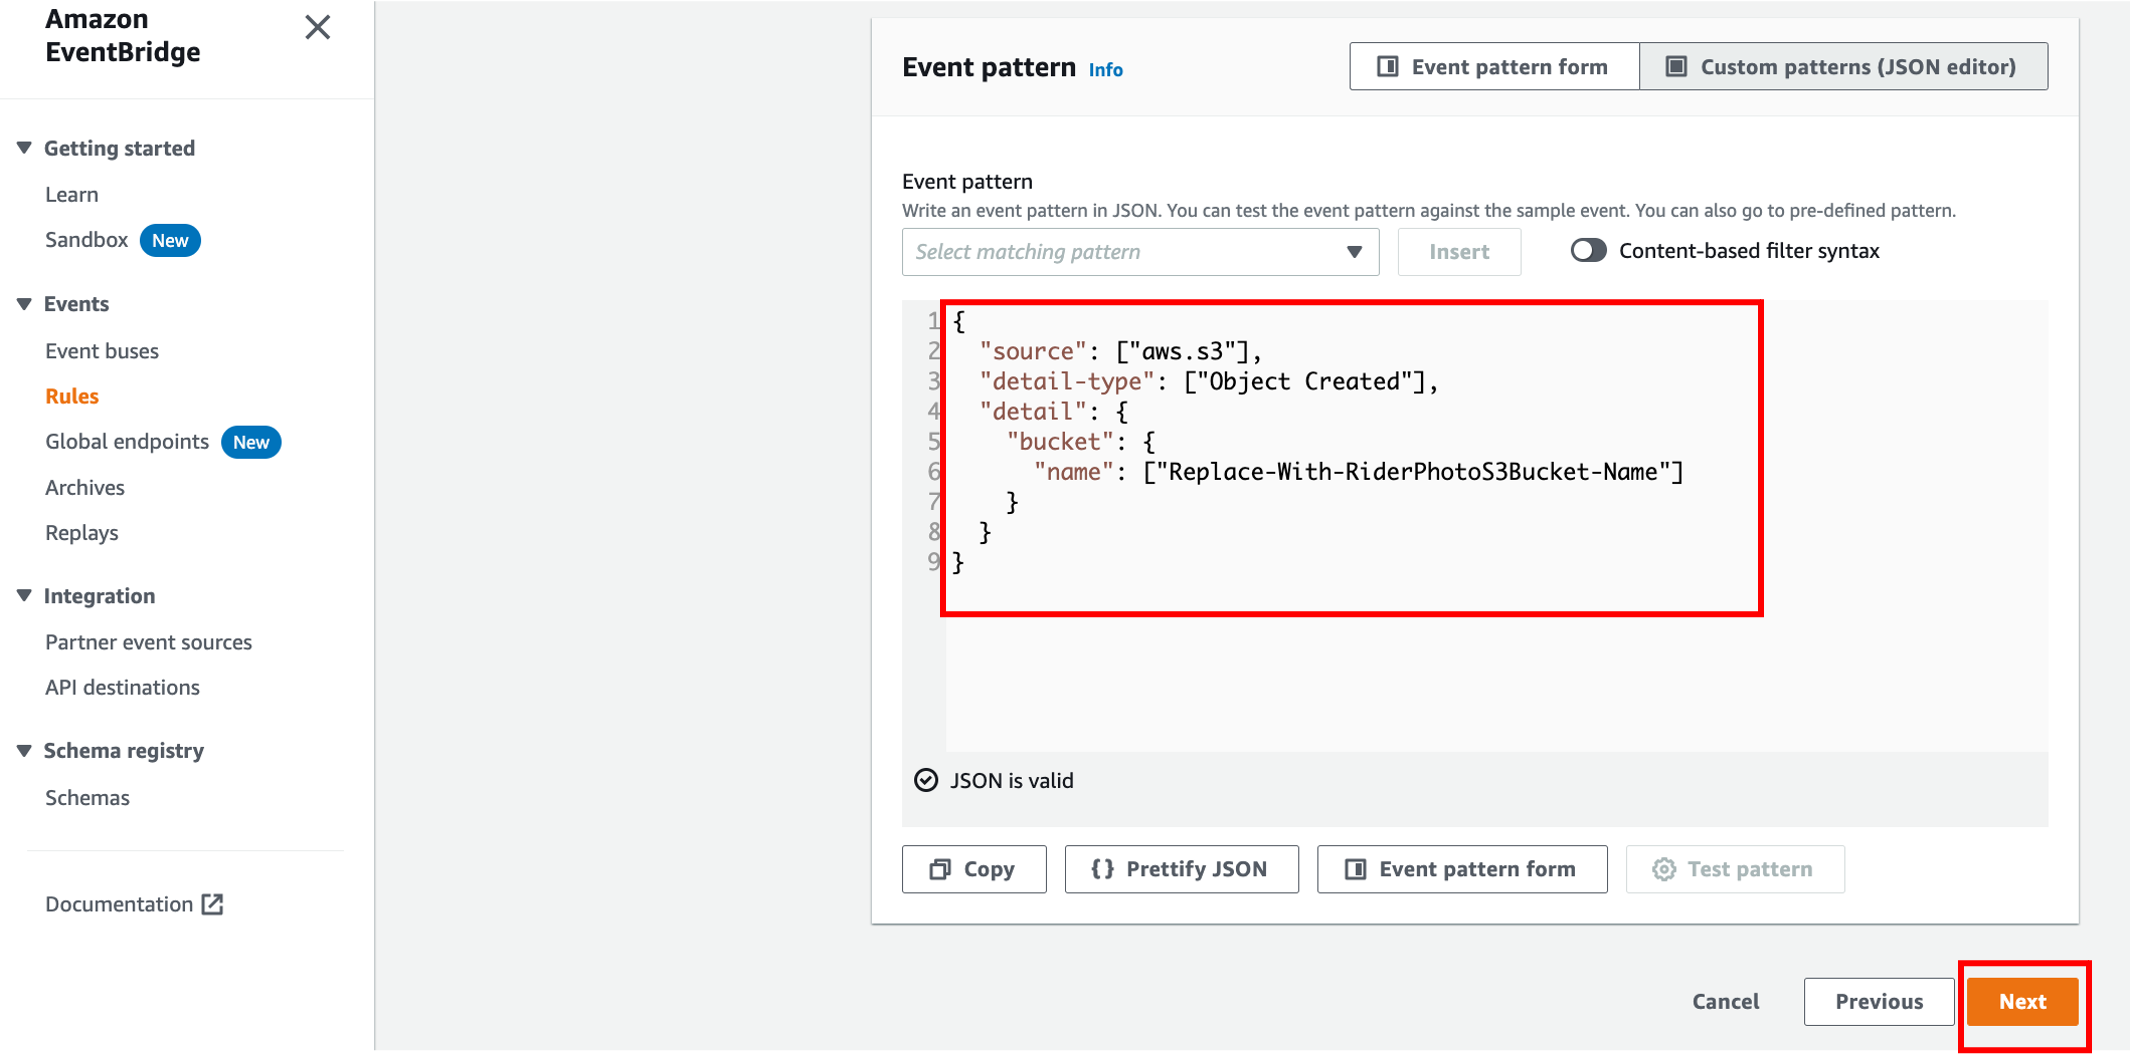
➡️ Step 4: Create your event pattern, by copying the following in a text editor and replacing the value of bucketName with your RiderPhotoS3Bucket value.
{
"source": ["aws.s3"],
"detail-type": ["Object Created"],
"detail": {
"bucket": {
"name": ["Replace-With-RiderPhotoS3Bucket-Name"]
}
}
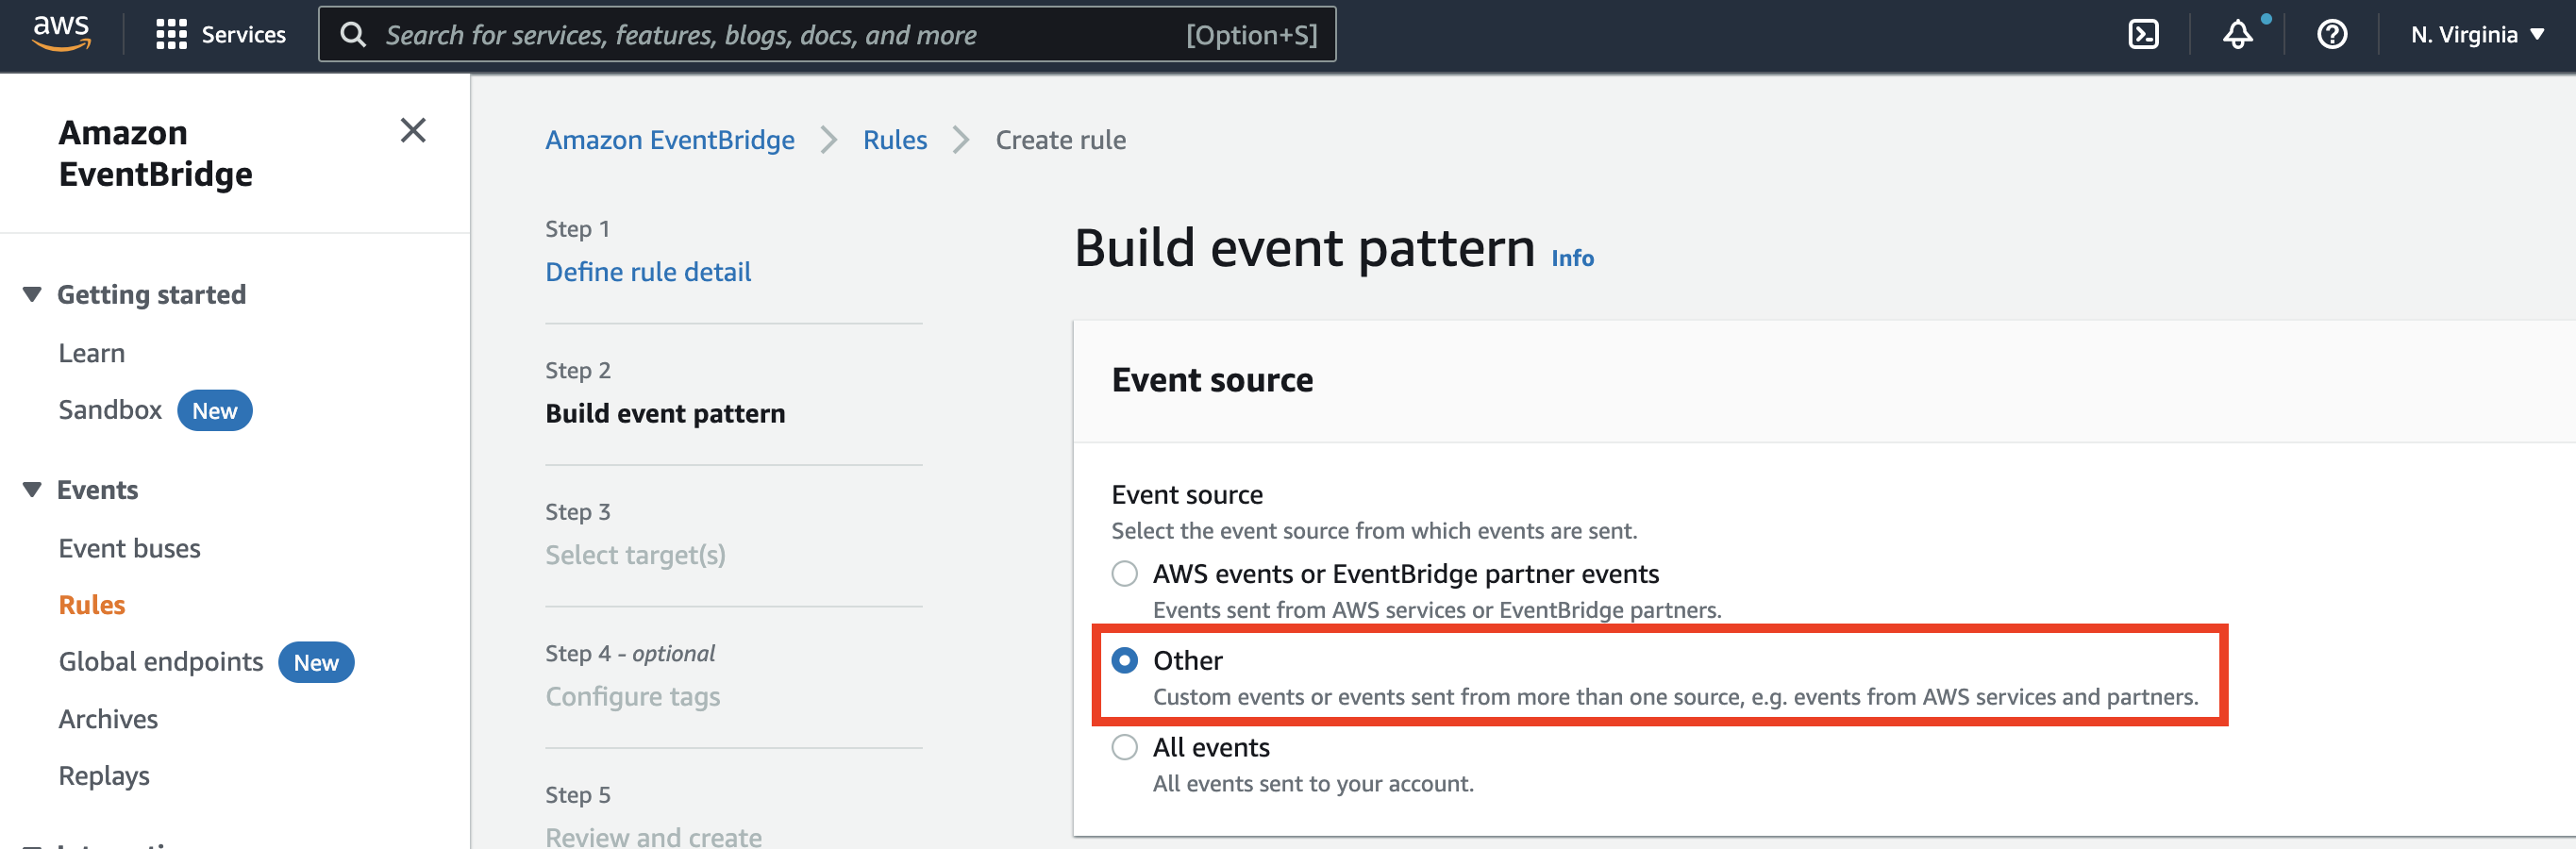
} ➡️ Step 5: Building the event pattern. Return to the AWS Console and then in the “Event source” section, select Other.
Skip past the Sample event section and scroll down to the Event pattern section. Copy/paste your event pattern from your text editor into the “Event pattern” text box on the form and click Next.
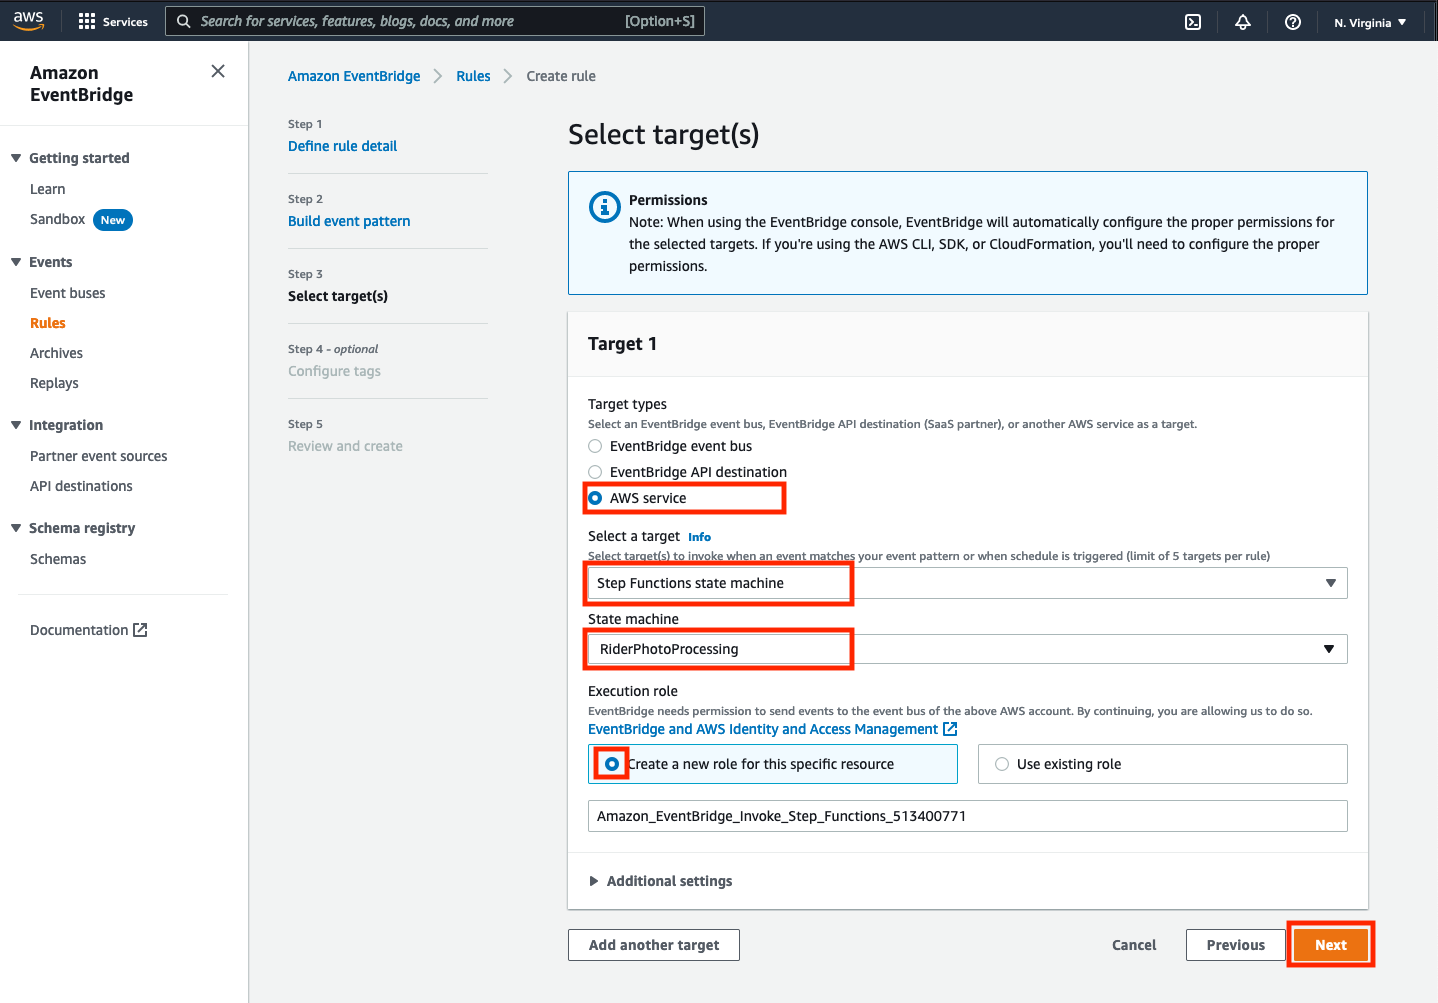
➡️ Step 6: Selecting event targets and finishing the rule creation process. For the “Target types”, select AWS service, and chose Step Functions state machine from the dropdown list of available targets. Select RiderPhotoProcessing for the State Machine value and click Create a new role for this specific resource. Finally, click Next.
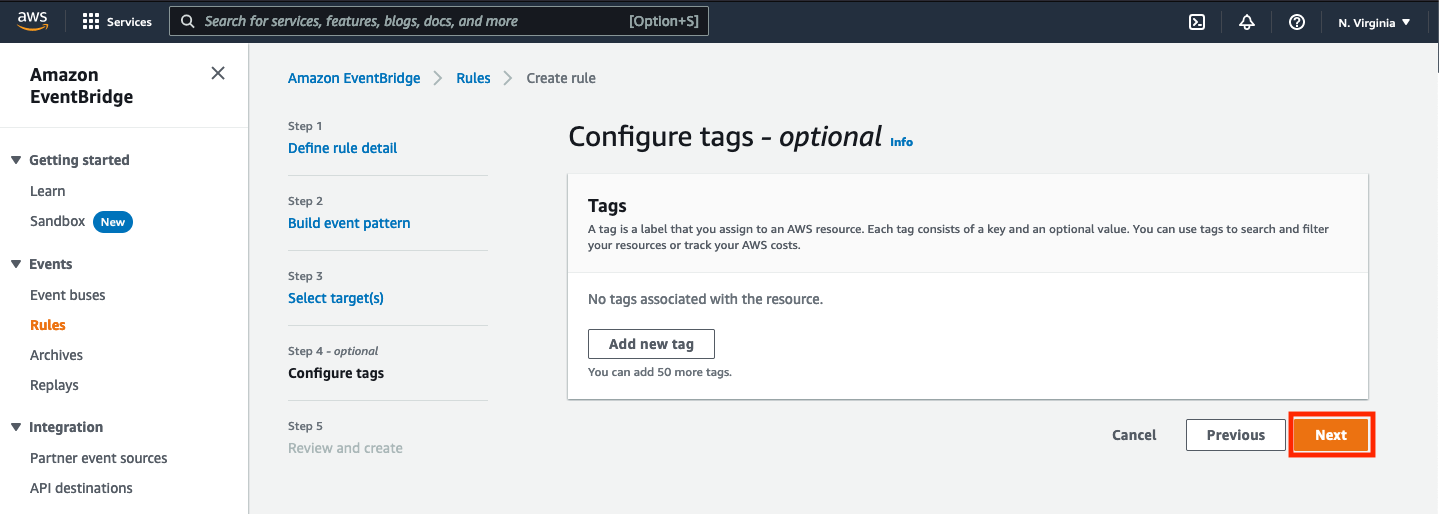
There is no need to add tags to this resource, so simply click Next
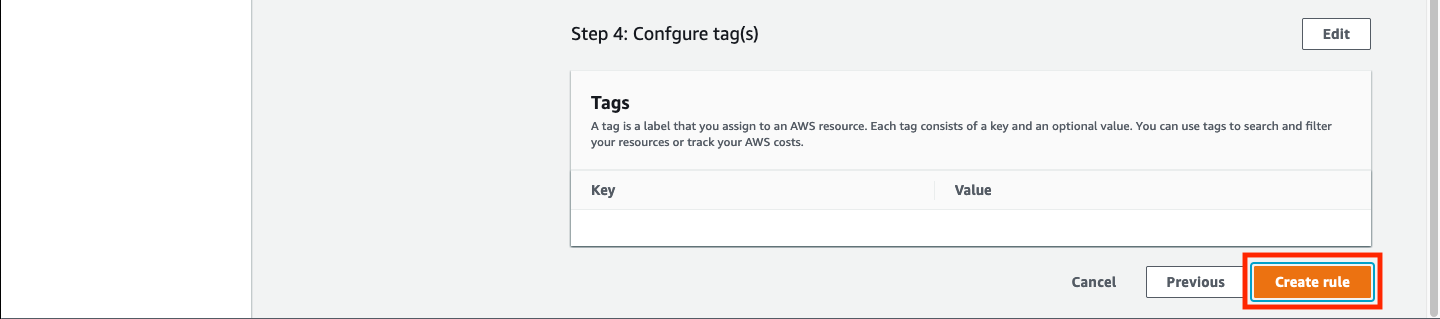
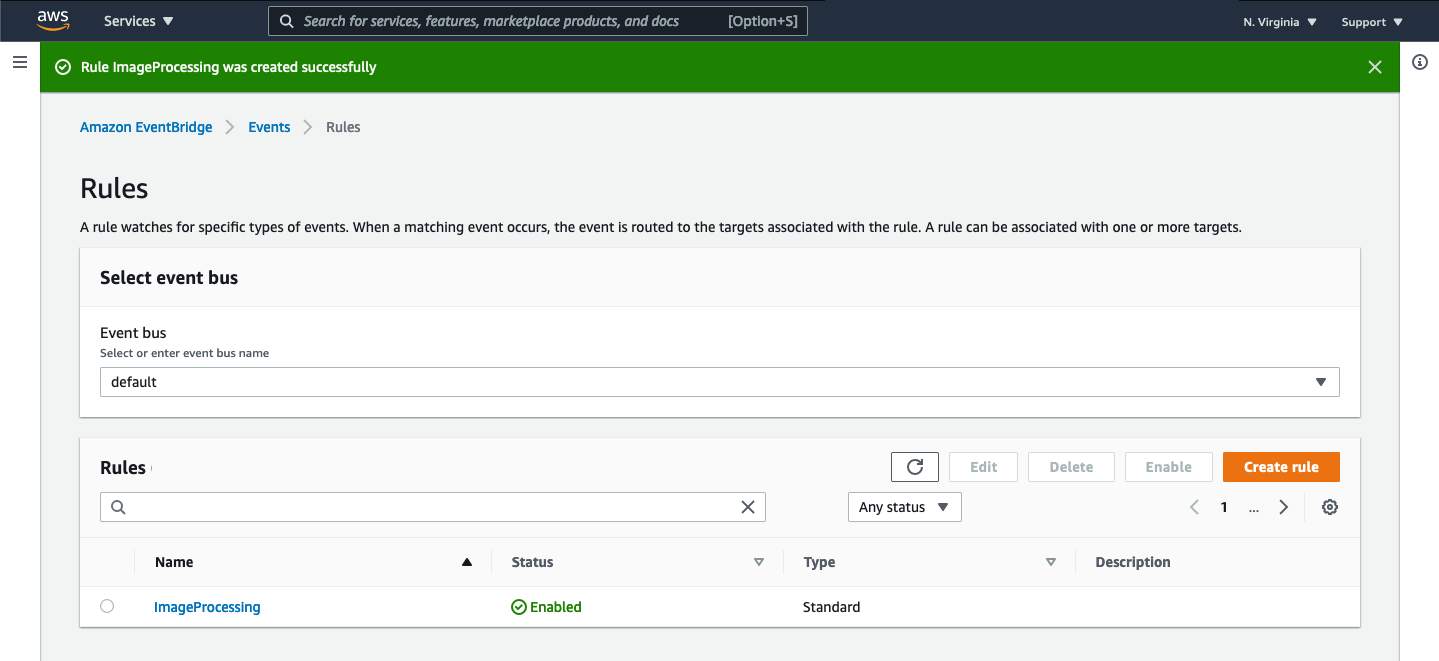
On the “Review and create” screen, scroll to the bottom of the screen and click the Create rule button to finish up the rule creation.
You should see that the ImageProcessing rule was created successfully.
Adjust our state Machine
Right now, our state machine is configured to require a JSON object input with three key-value pairs. However, the EventBridge event we just created will not contain these key-value pairs. We must adjust our state machine to handle two different types of input. One contains the key-value pairs that we pass in when starting an execution of the state machine manually. The other is the EventBridge event input. However, we must transform that EventBridge event to look like the manual event since that is what the Lambda functions expect. To do this, we need to create a branch at the start of our state machine that, depending on the type of input received, will perform the necessary handling of both types of input.
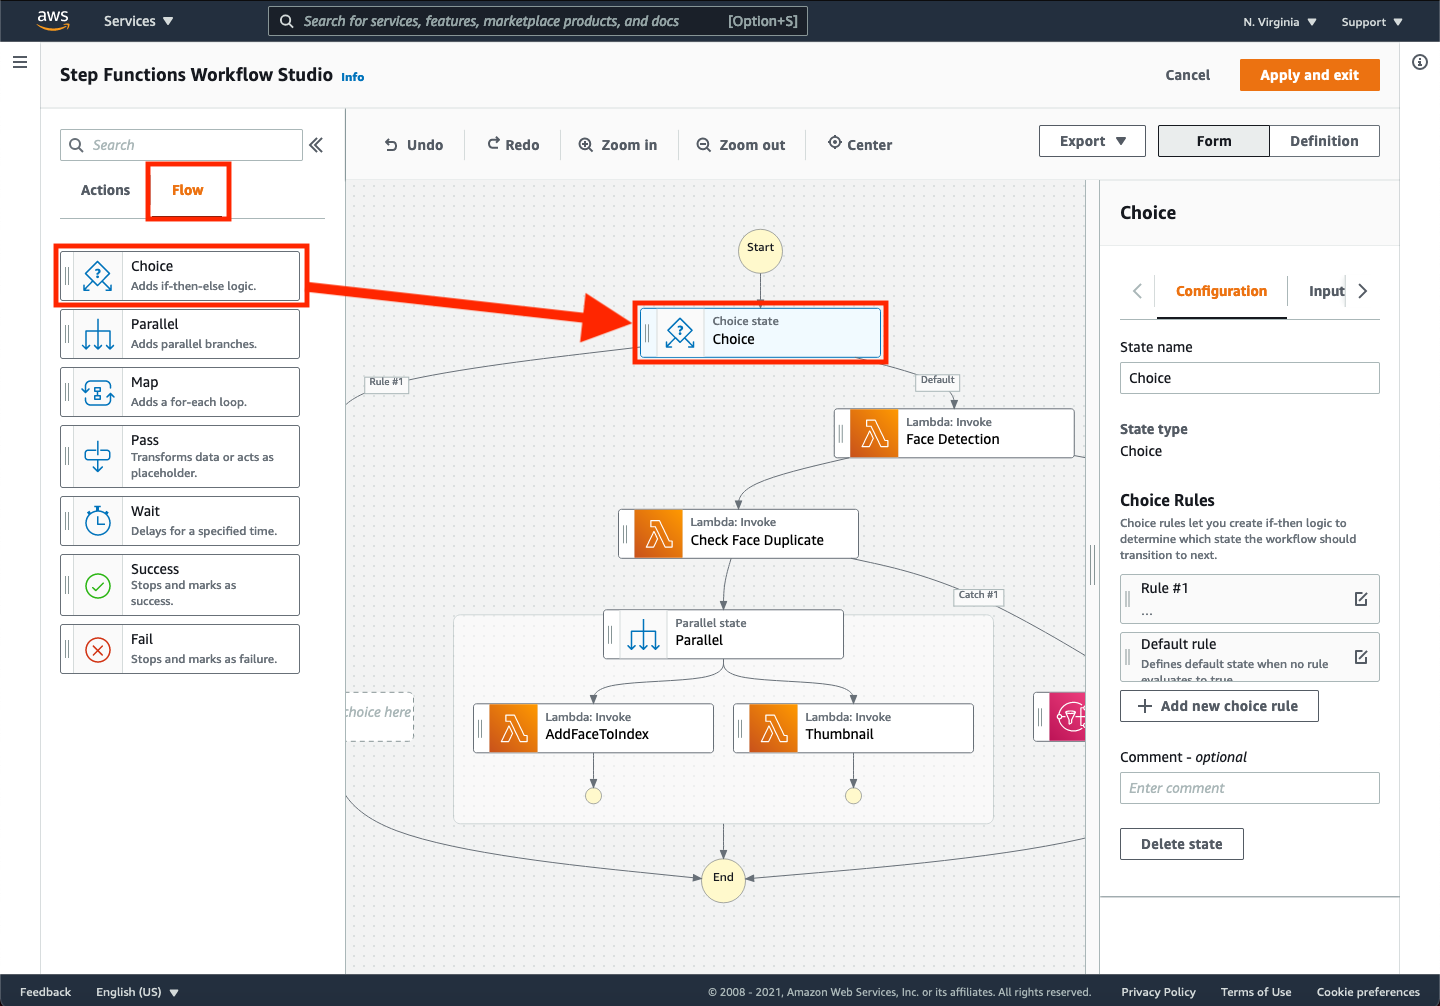
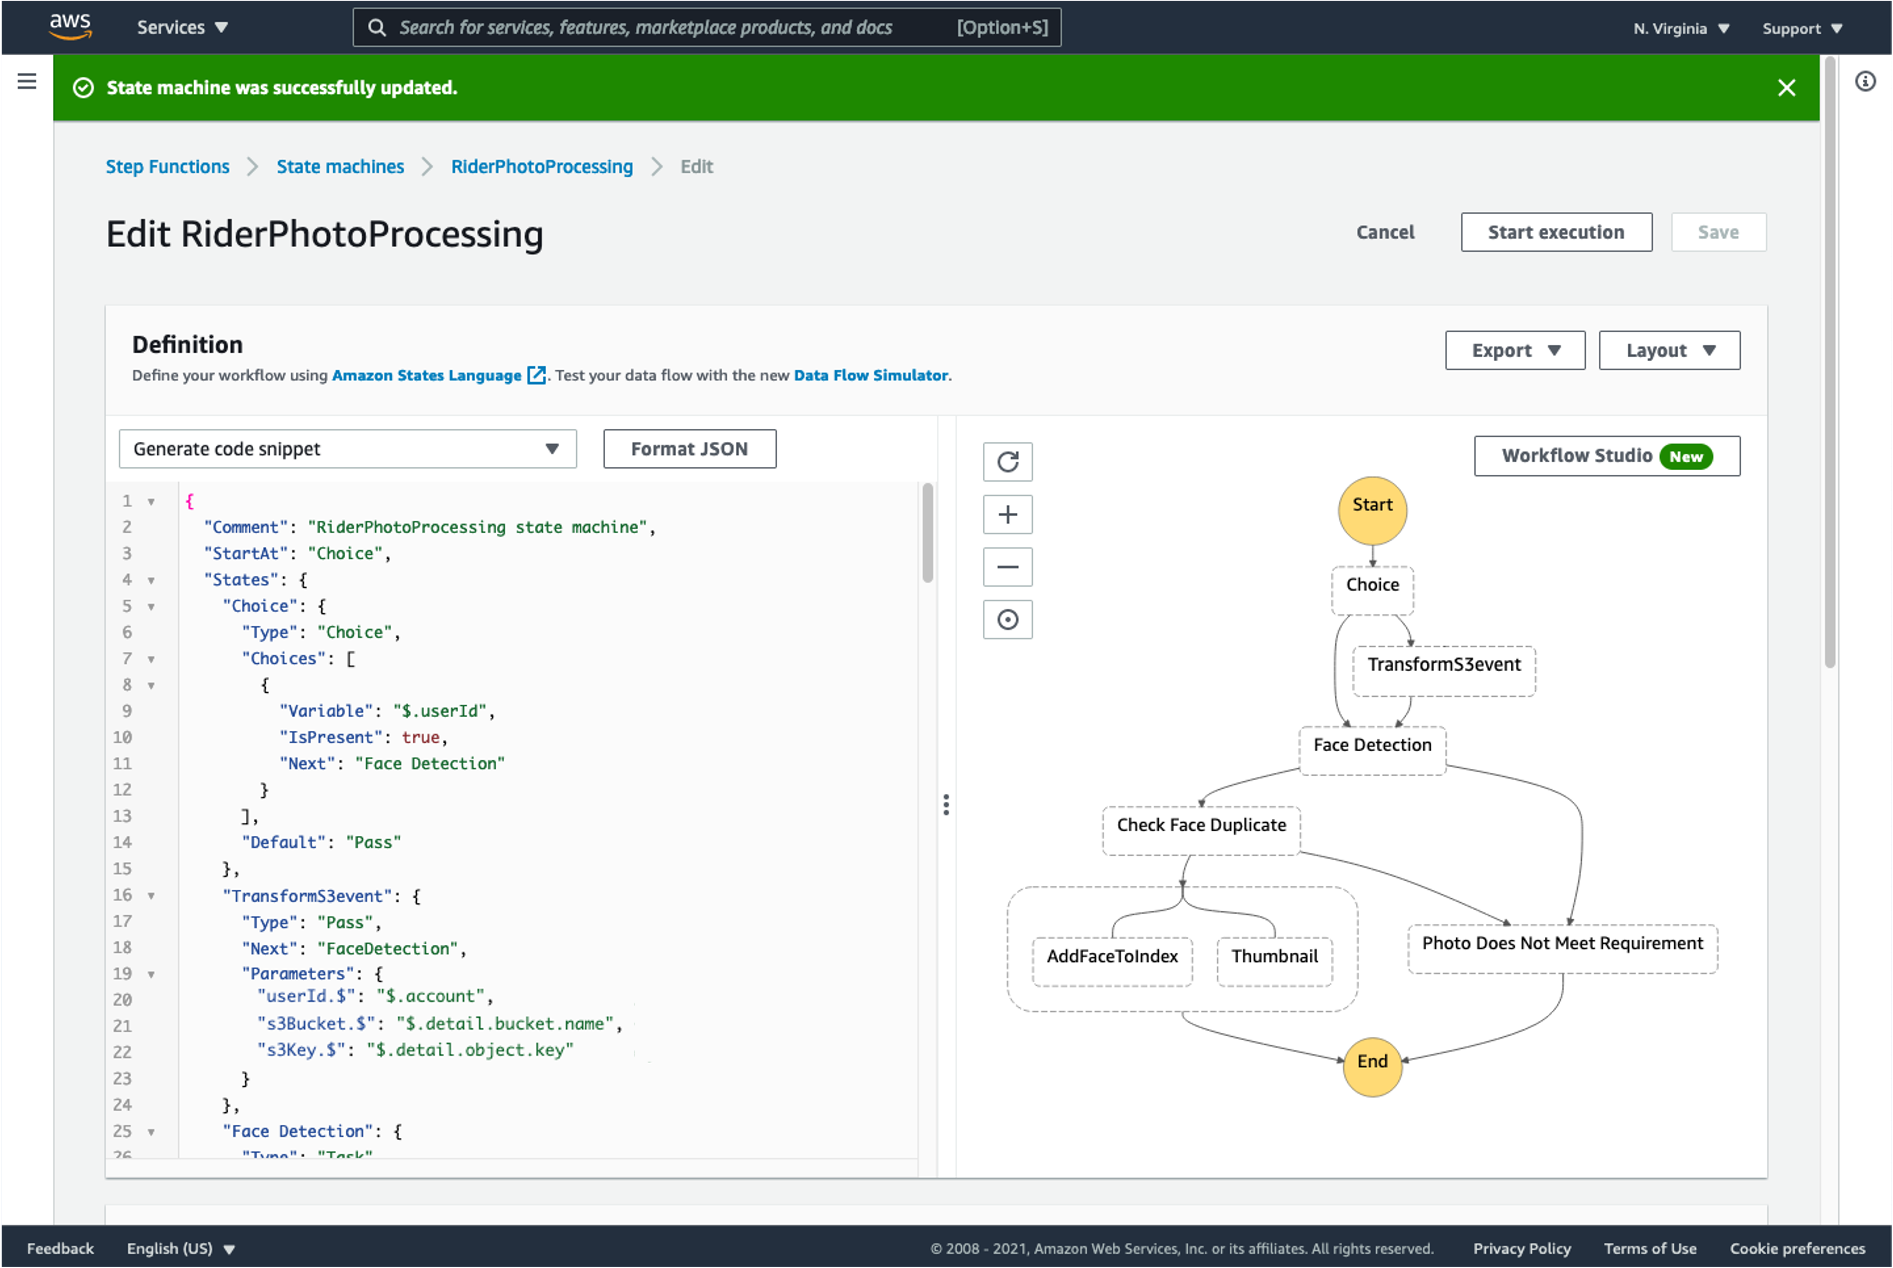
➡️ Step 7: Return to the Workflow Studio to edit our state machine. Choose Flow in the “States browser” and drag and drop a Choice state between the Start and Face Detection steps.
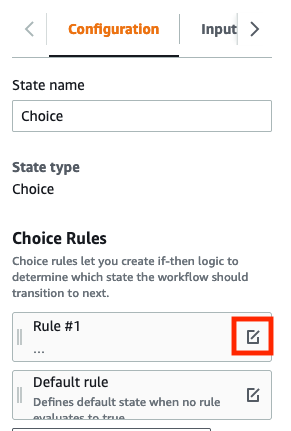
➡️ Step 8: Configure the choice rules. Click the icon to the right of the “Rule #1”.
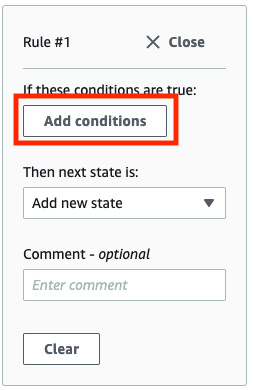
Then click Add conditions.
This will bring up a rule editor to determine which path the state machine should choose. We will configure a simple rule that checks to see if the userId value is present. For manually triggered events, this will be true, but for EventBridge events it will be false.
We could make a very complex rule set that checks for all key-value pairs, but for the sake of simplicity, we’ll just create a simple rule checking for one key-value pair. You can explore this rule builder to try and create more complex rules or handle conditions not covered in here outside the context of this workshop.
Configure the rule as follows:
- Enter
$.userIdfor the “Variable” value - Select
is presentfor the “Operator” value
Your rule should look similar to the following:
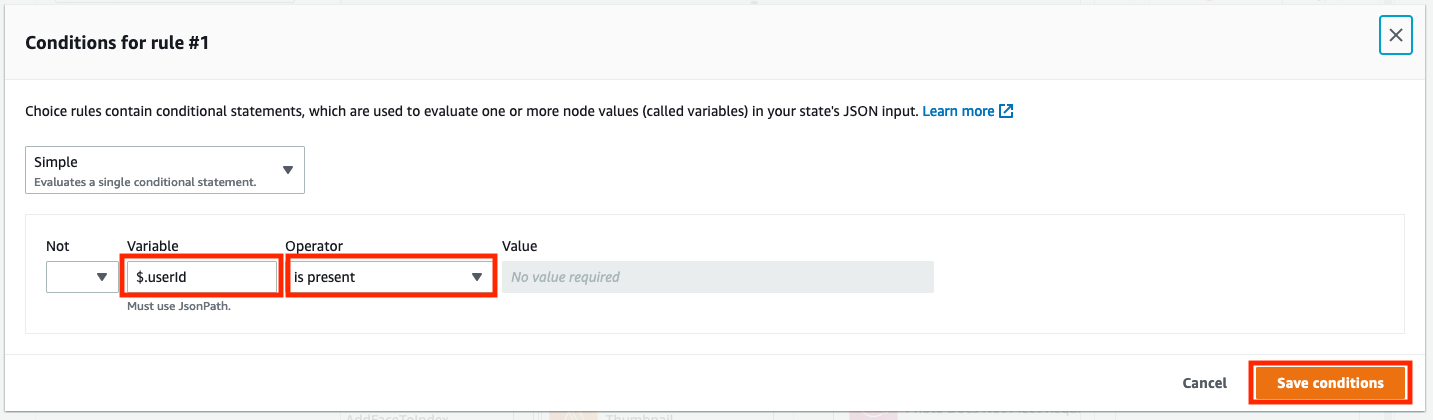
Click Save conditions. When you return back to the Workflow Studio view, set the Then next state is: value to Face Detection
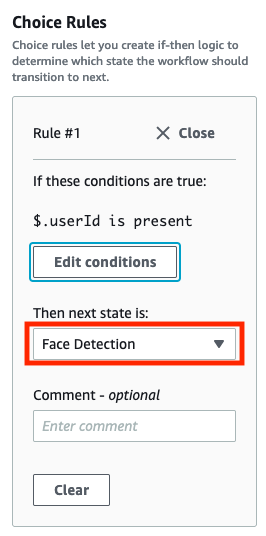
➡️ Step 9: Both the “Rule 1” path, and the “Default” path should lead to your Face Detection step. However, if userId is not present, we want the default route to transform the EventBridge event into suitable input to the Face Detection function. To do that, drag and drop a Pass flow state to the default branch.
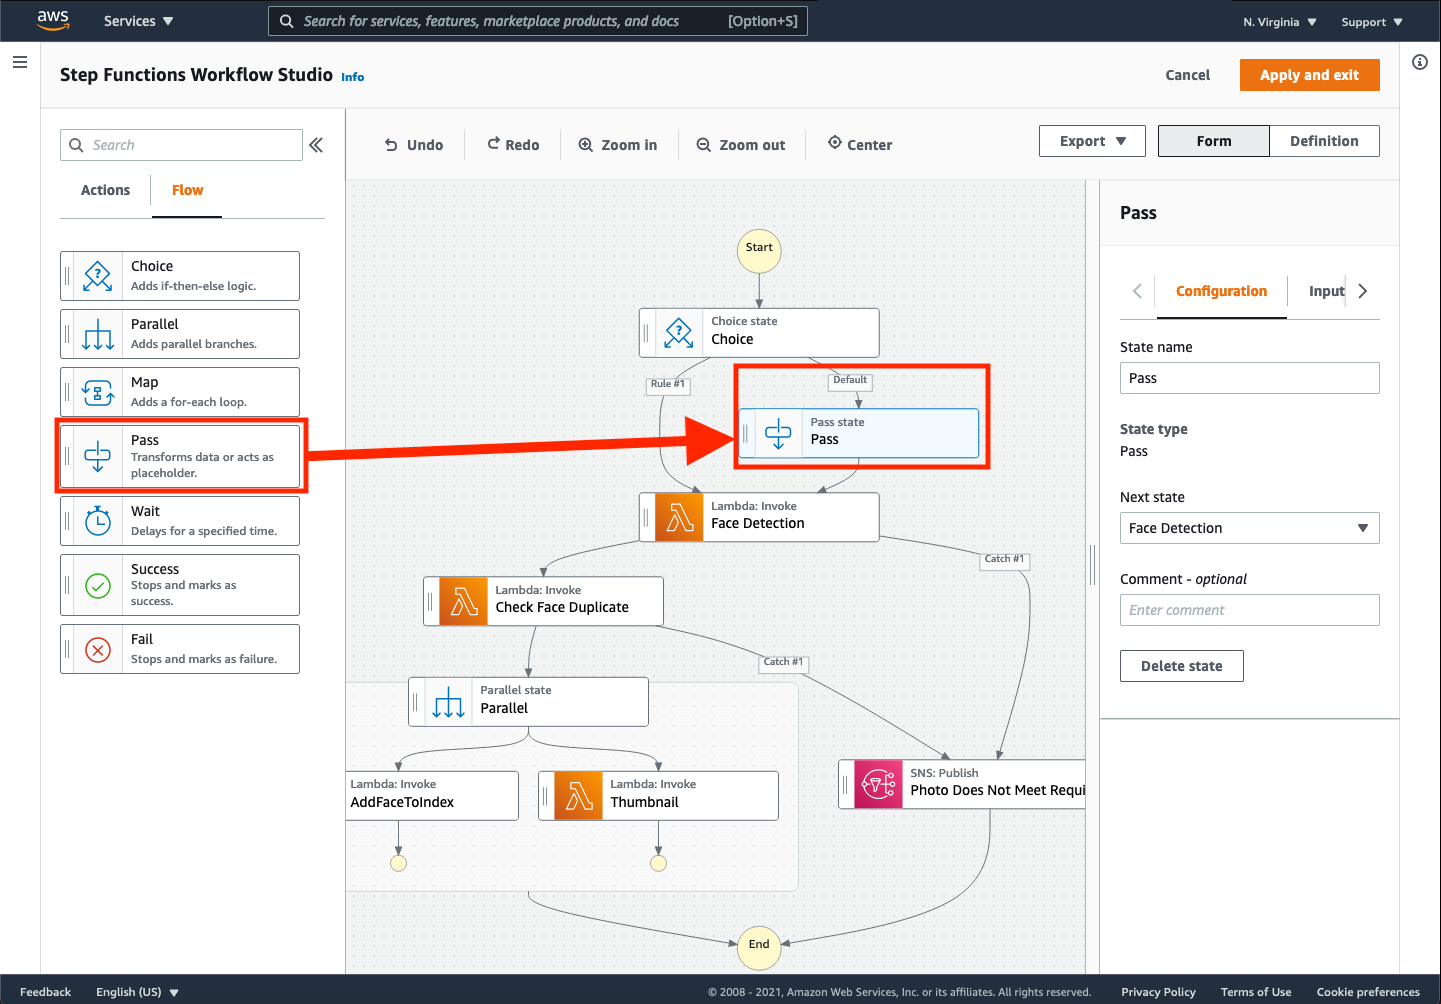
➡️ Step 10: On the Configuration tab for the Pass State, Change the State name value to TransformS3event.
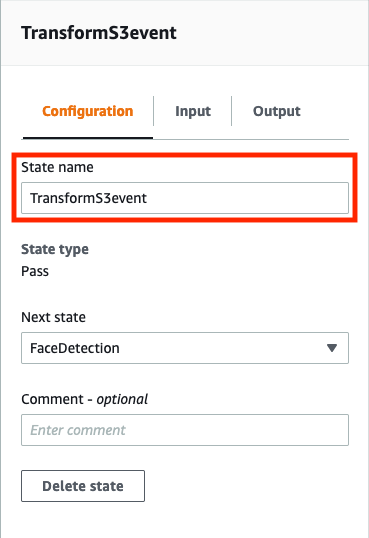
➡️ Step 11: On the Input tab for the Pass State, check the Transform input with Parameters option, and paste the following in the text box.
{
  "userId.$": "$.account",
  "s3Bucket.$": "$.detail.bucket.name",
  "s3Key.$": "$.detail.object.key"
} 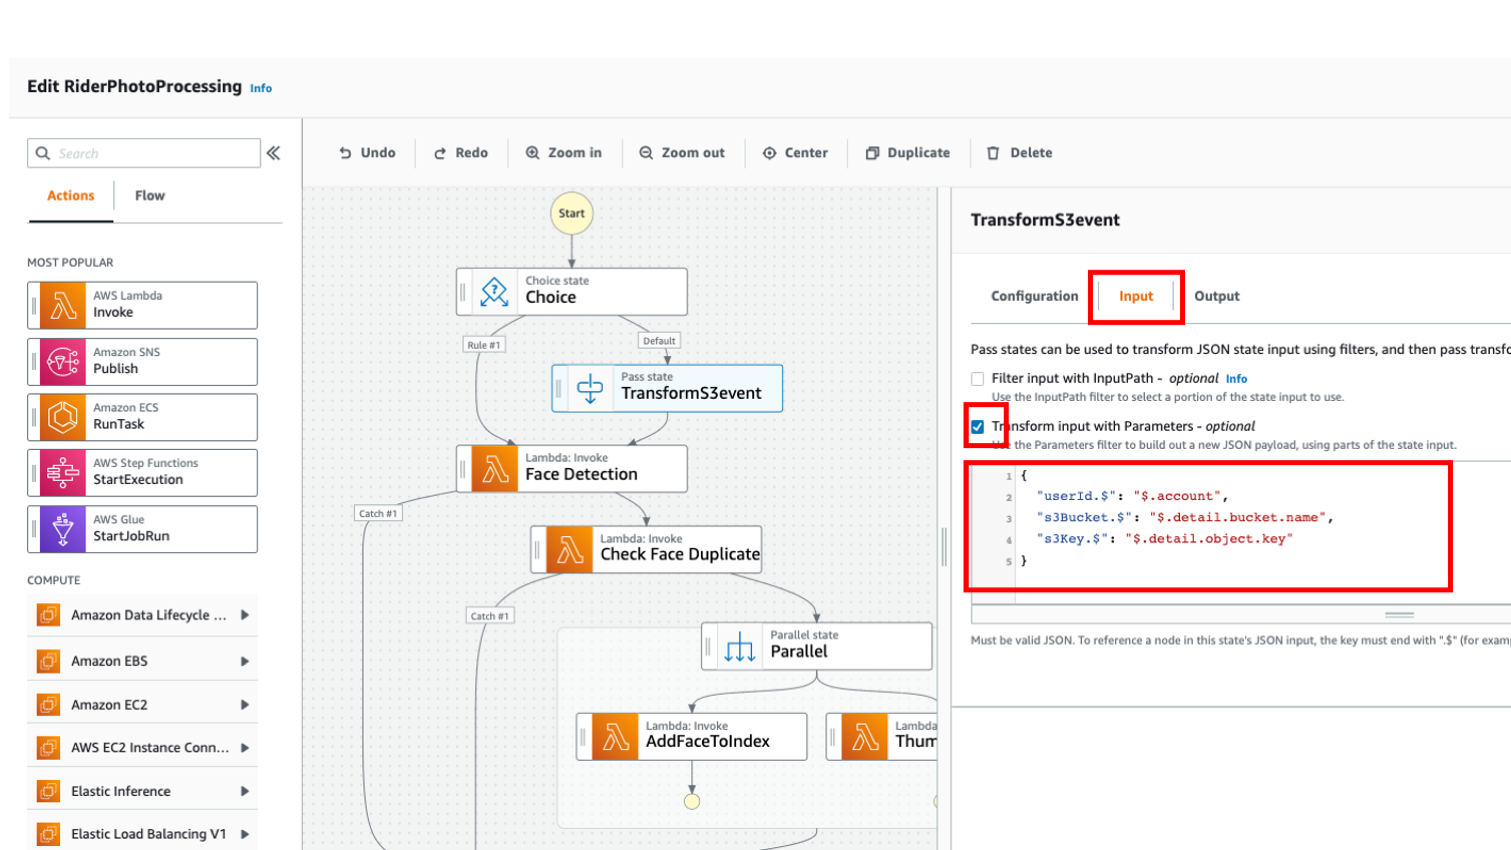
Note that you don’t have to modify the values of the JSON above. It will dynamically pick the values out of the EventBridge event and place them in the correct values for the input event expected by the Lambda function. One caveat is that the userId is now tied to the AWS Account Id that is uploading the image. When we test this later, you’ll find that you can only trigger the Step Function state machine once this way unless you remove the face index from the Rekognition collection associated with your AWS Account Id after every S3 upload.
Before moving on, let’s consider what we’ve done here. With no change to any of the Lambda functions, we’ve created a way to successfully reuse our workflow in response to different triggering event sources. This simplifies worklflow management by not requiring a different state machine for different event sources and allows testable and transparent changes to accommodate additional triggering events that may arise in the future. Take some time to consider how this functionality might be useful for simple data transformations in general.
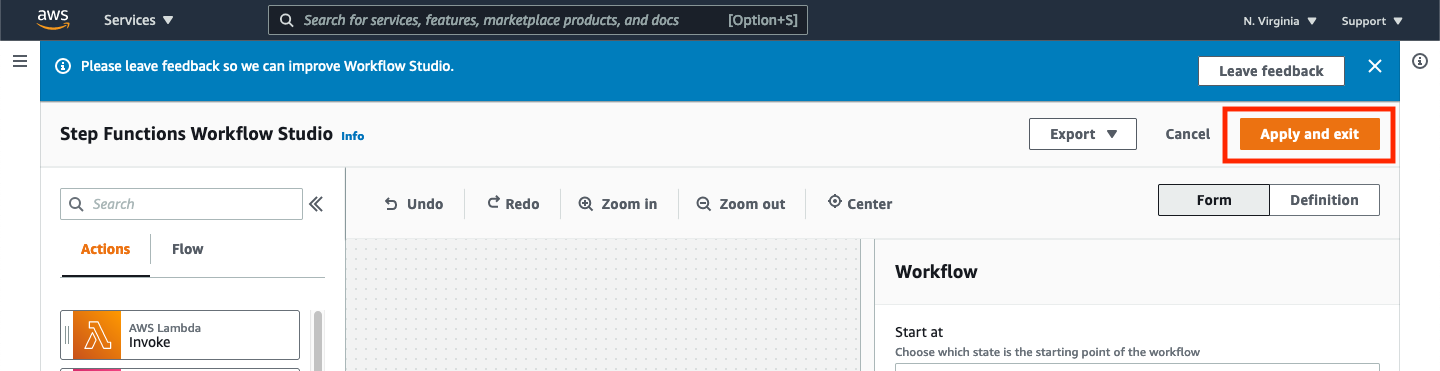
➡️ Step 12: Click Apply and exit in the top right of the window to apply all changes and return to the state machine definition page.
To save the changes you made, you must also click the Save button in the top right of the state machine definition page.
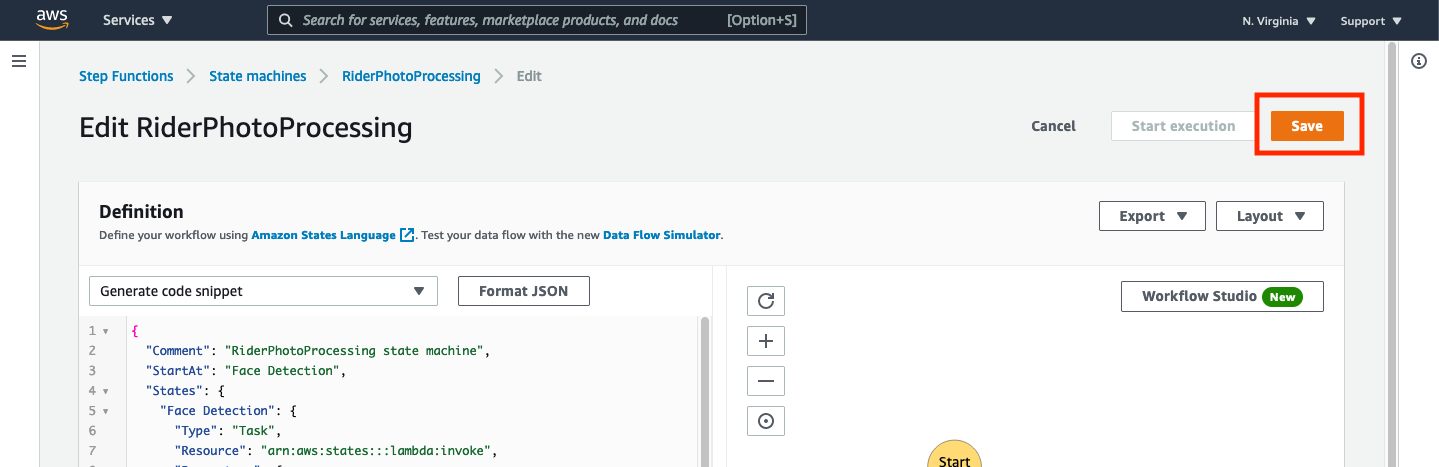
Saving changes to the state machine made using the Workflow Studio interface requires both applying the changes (to leave the Workflow Studio interface) and pressing the Save button once you have exited the workflow interface. If you fail to do either of these steps, the changes made to the state machine will not be saved.
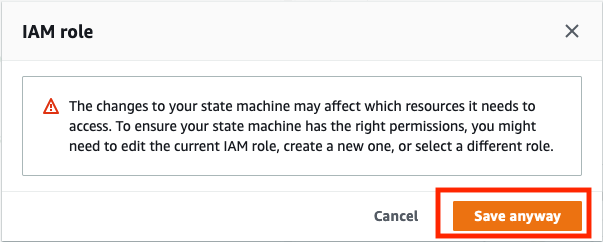
You may get an alert dialog when saving informing you that your changes may affect the resources the state machine needs to access. Click Save anyway.
At this point, your saved state machine should look similar to the following:
Test the trigger
Now we can test the S3 upload event trigger. First, find a picture that we’ve not previously used (you can use any .png or .jpg, but try to use one with a single person with a clear view of thier face). Then, let’s upload it to S3.
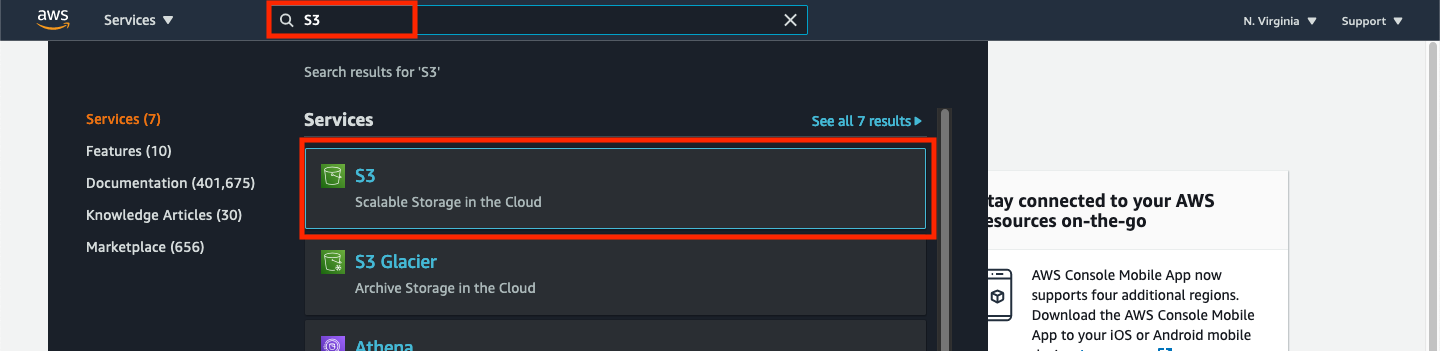
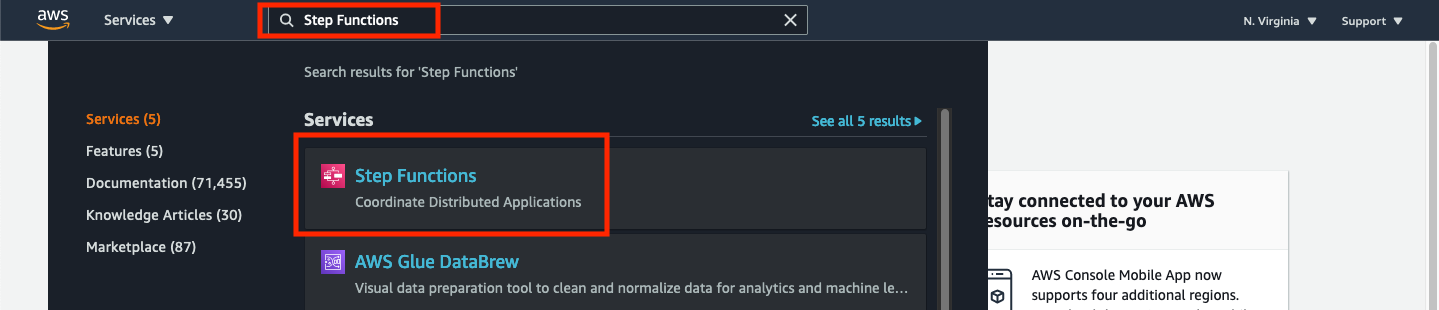
➡️ Step 13: From the AWS Management Console, type “S3” in the search field at the top of the window and select S3 from the list of services.
➡️ Step 14: In the list of buckets, click the bucket beginning with wildrydes-step-module-resource-riderphotos3bucket-. You should see four objects in that bucket corresponding to the images that we pre-populated from the CloudFormation template.
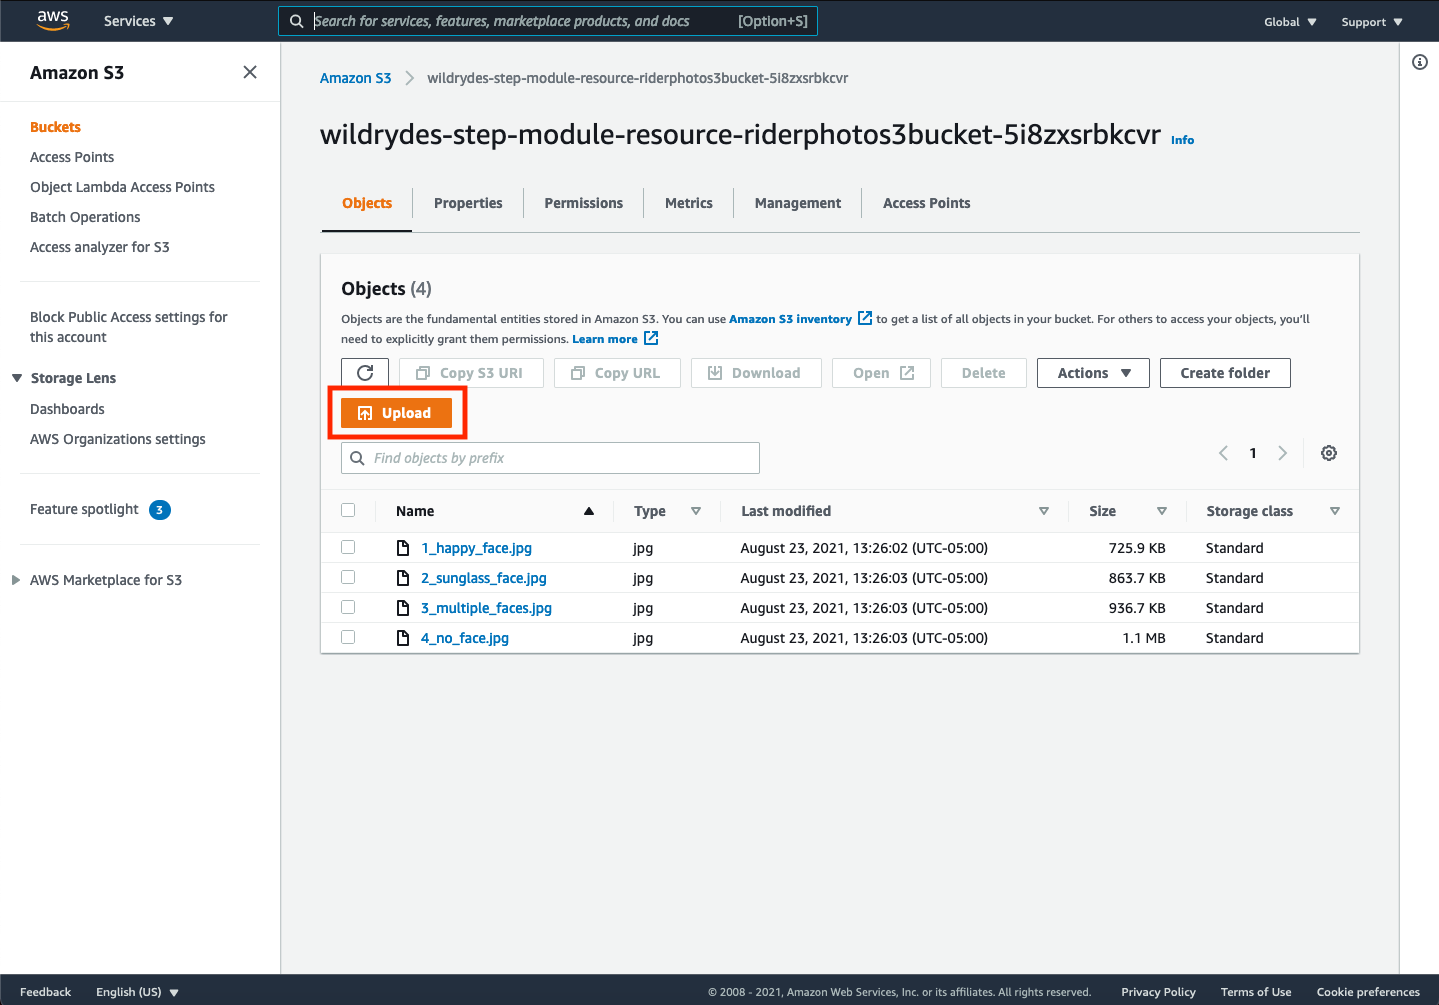
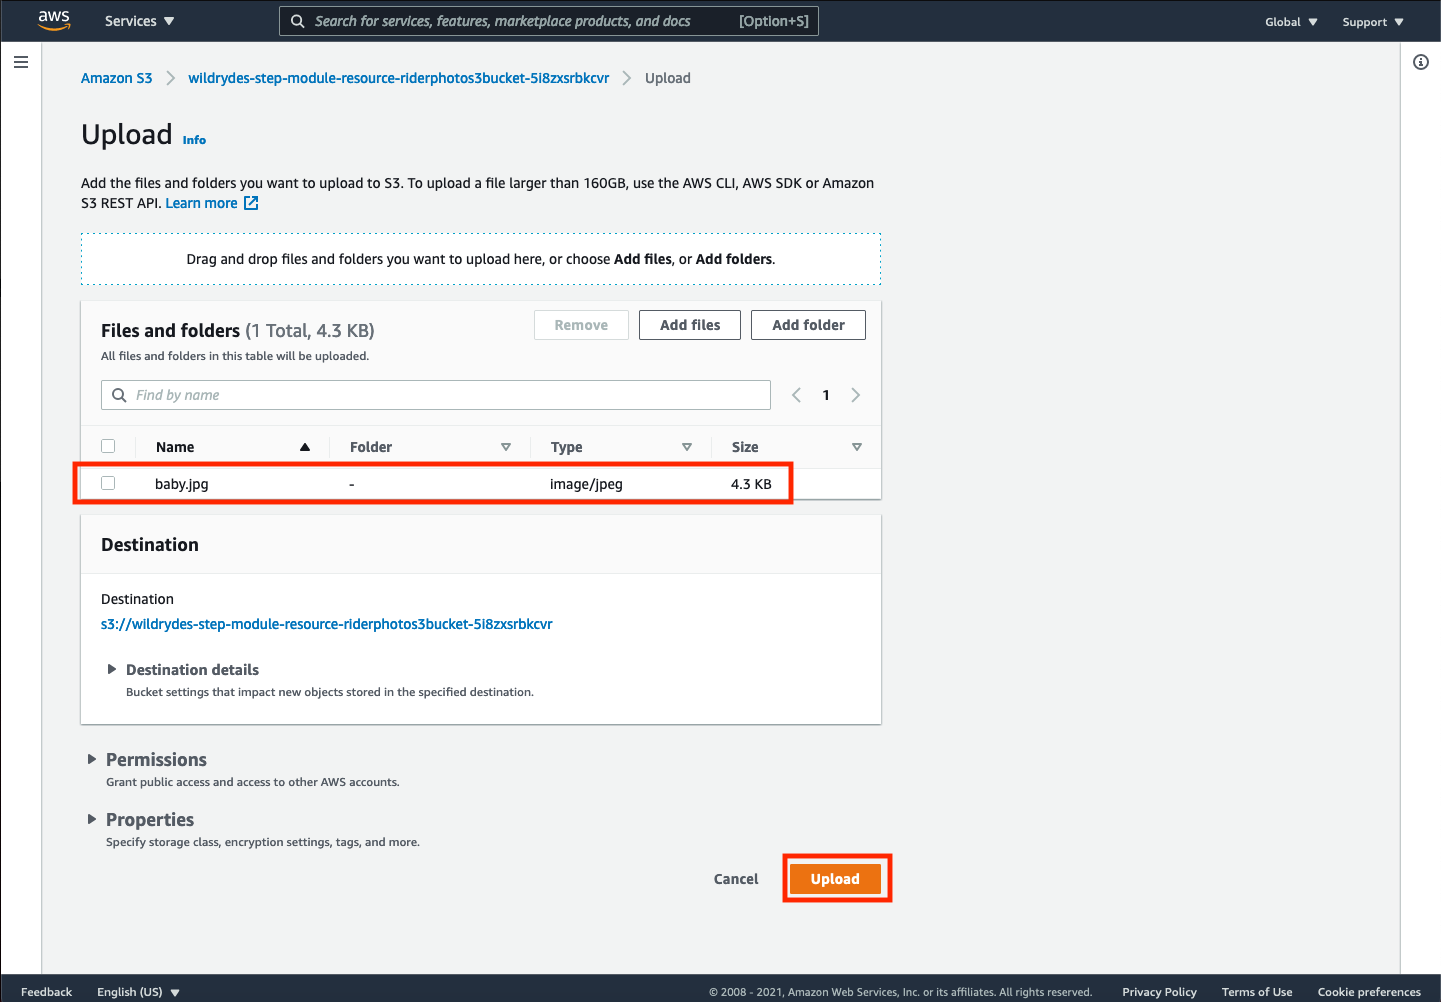
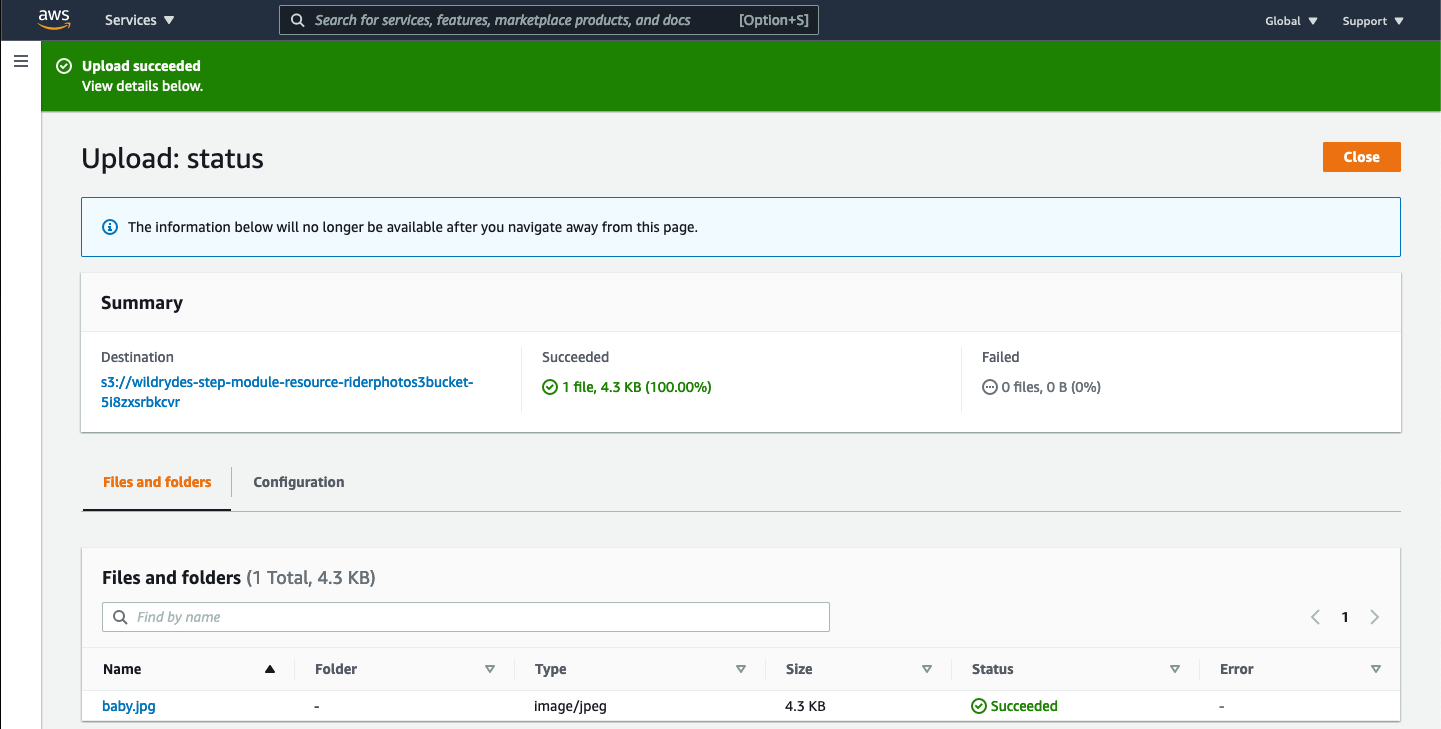
Click the Upload button. Then drag and drop your own image file from your computer onto the browser window to add it to the list of files to be uploaded. In this example, you can see a file named baby.jpg was added. Then click Upload.
If your upload was successful, you should see a notification like the following:
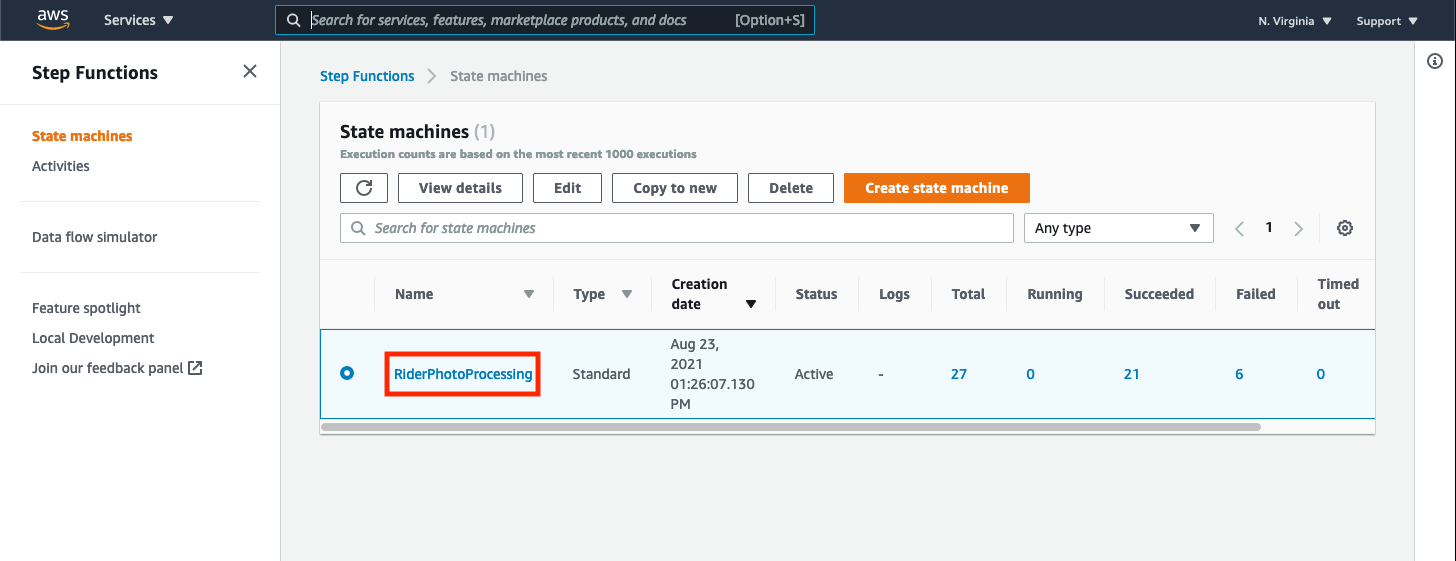
➡️ Step 15: From the AWS Management Console, type “Step Functions” in the search field at the top of the window and select Step Functions from the list of services.
➡️ Step 16: Click the link for your state machine named RiderPhotoProcessing.
➡️ Step 17: Check the Executions section to see that the a new execution is running (or just finished).
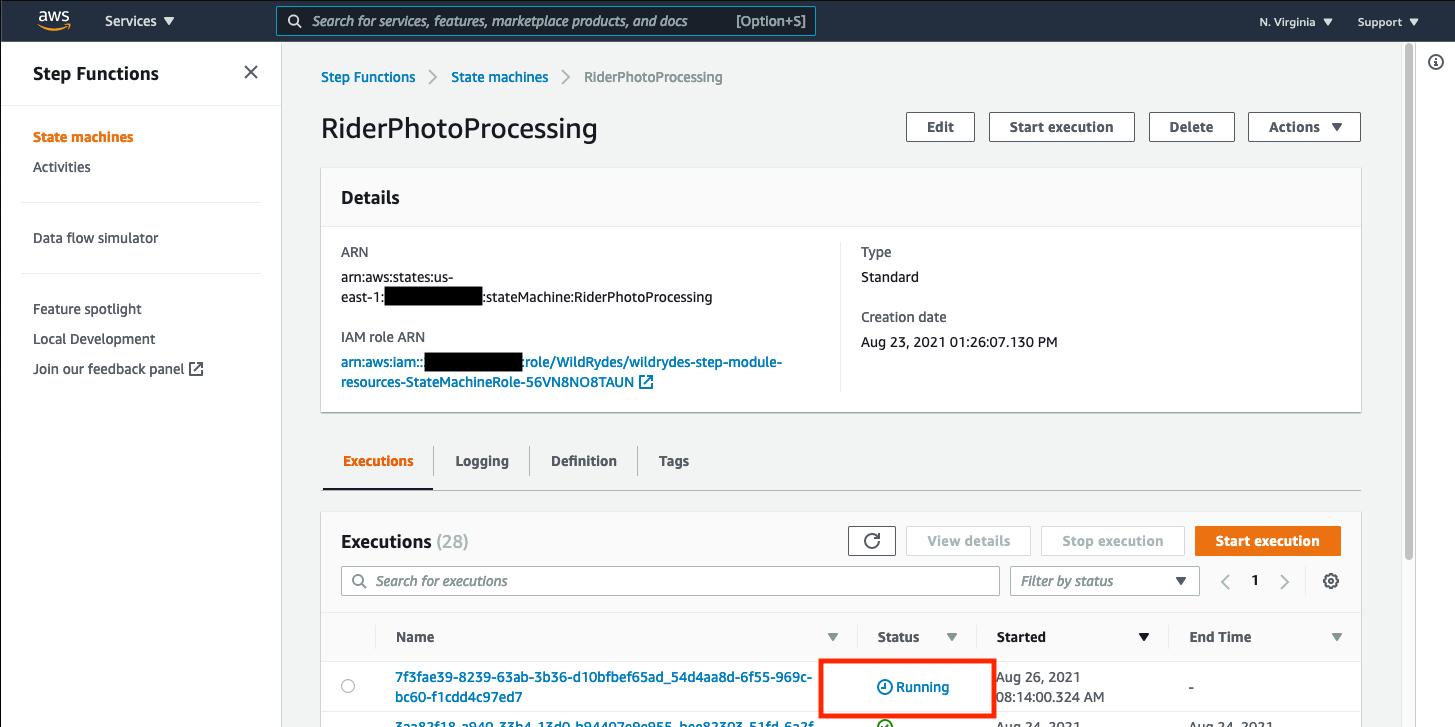
✅ Congratulations! You have now triggered your state machine to execute using an S3 event. You can continue to test this functionality (but remember to remove your indexed face from the Rekognition collection after each execution) by repeating the process above. You can also dig deeper to examine the results of the execution. For example, what happens if you upload two pictures?