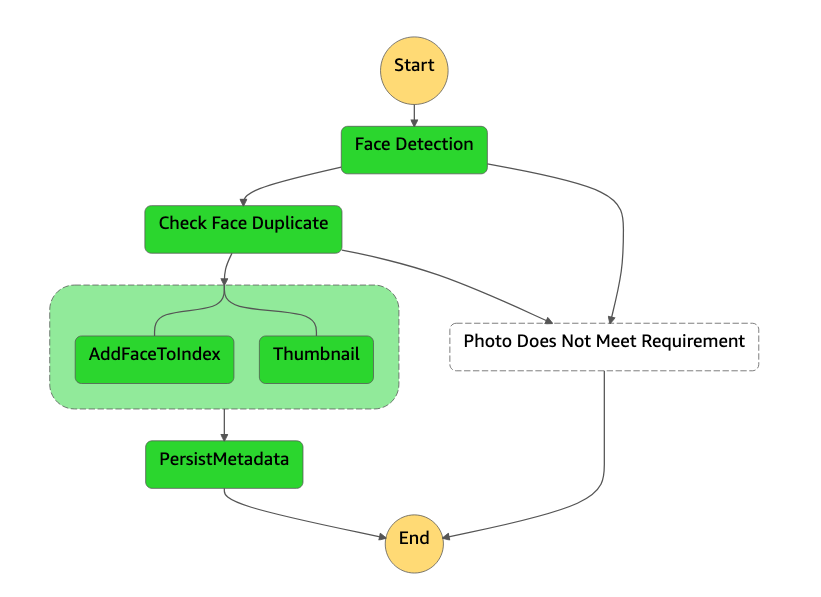
Metadata Persistence
Add metadata persistence step
The last step of our image processing workflow is to persist the metadata of the profile photo with the user’s profile. We are going to save the image metadata with the user profile using Amazon DynamoDB.
The name of Amazon DynamoDB table that persists the metadata can be found in the in AWS CloudFormation output RiderPhotoDDBTable.
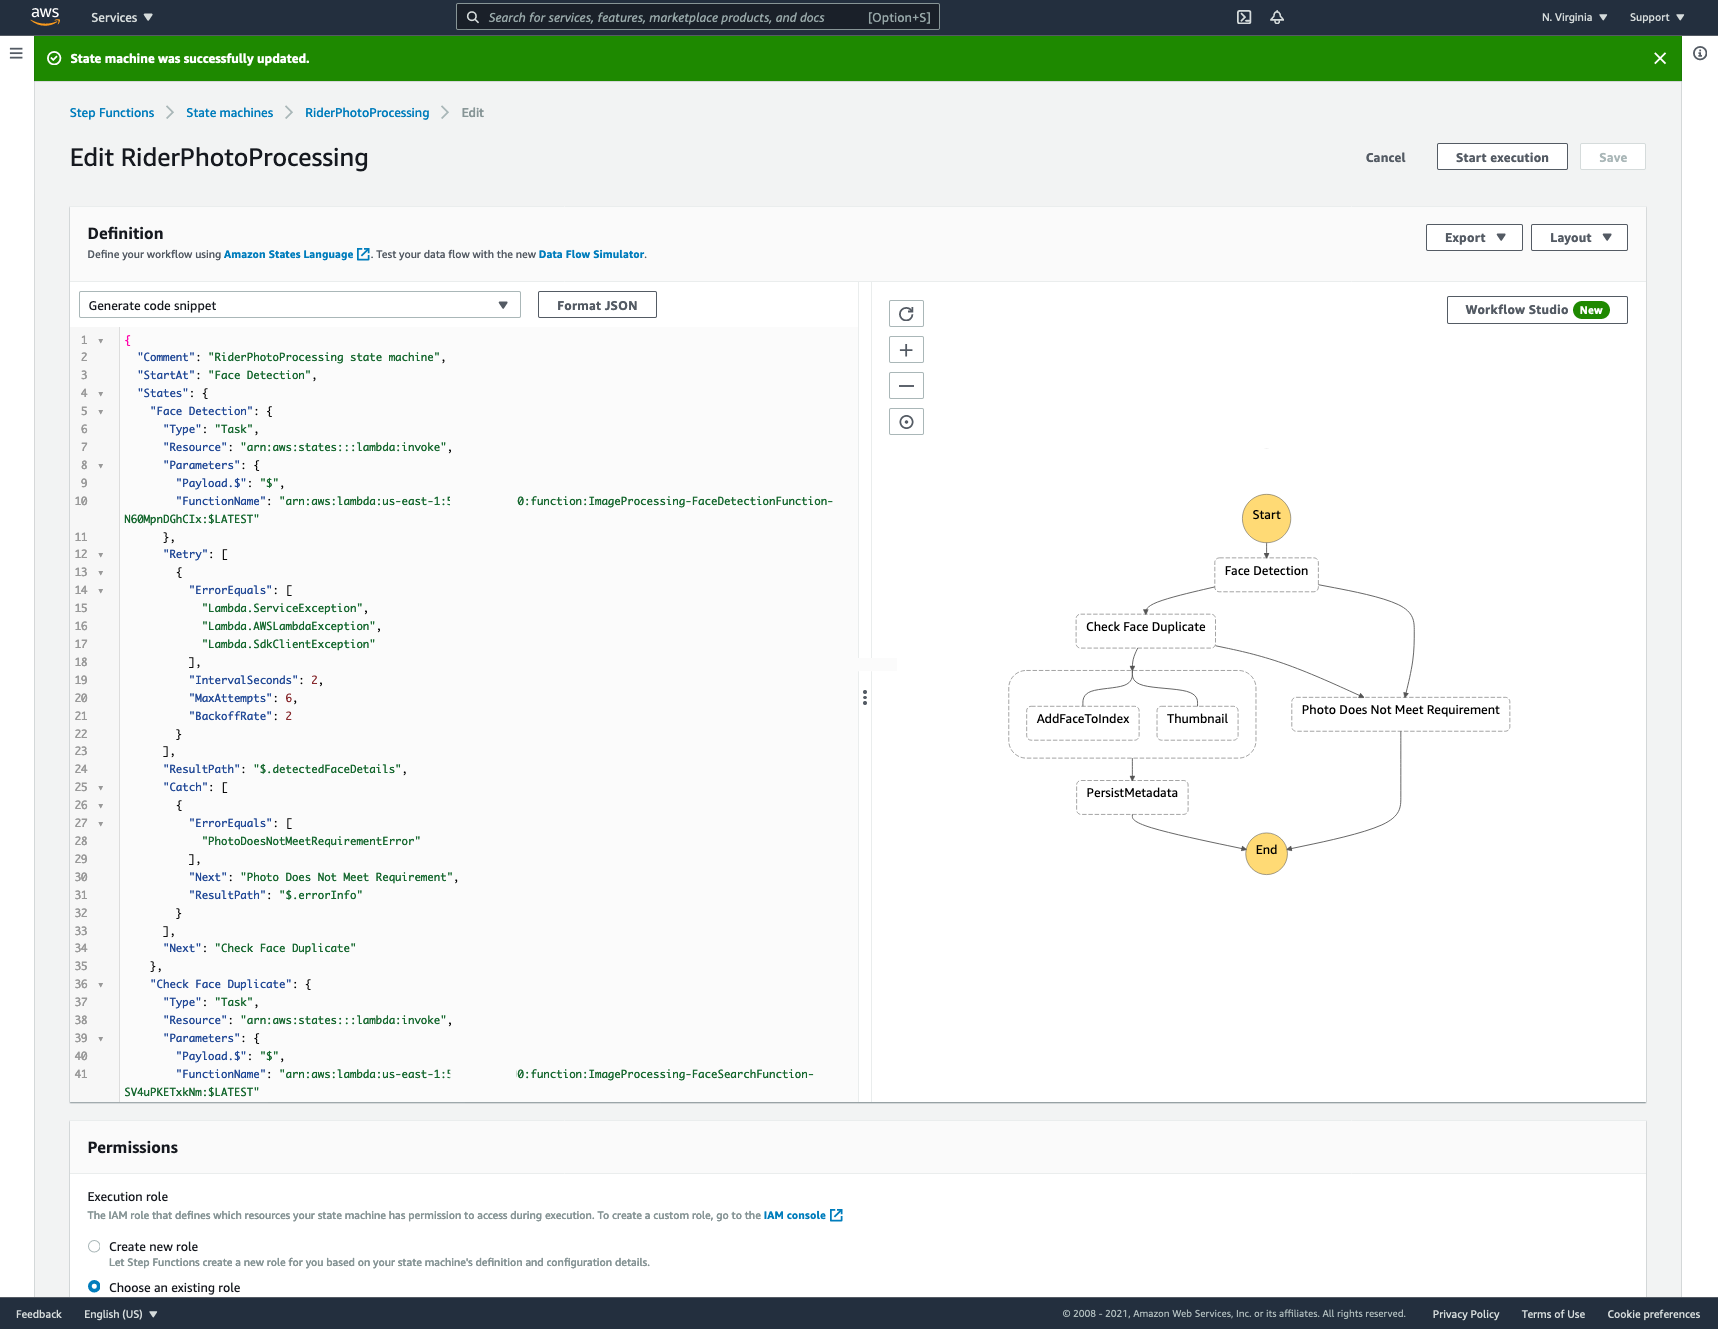
In the end of this section, your state machine should resemble the following:
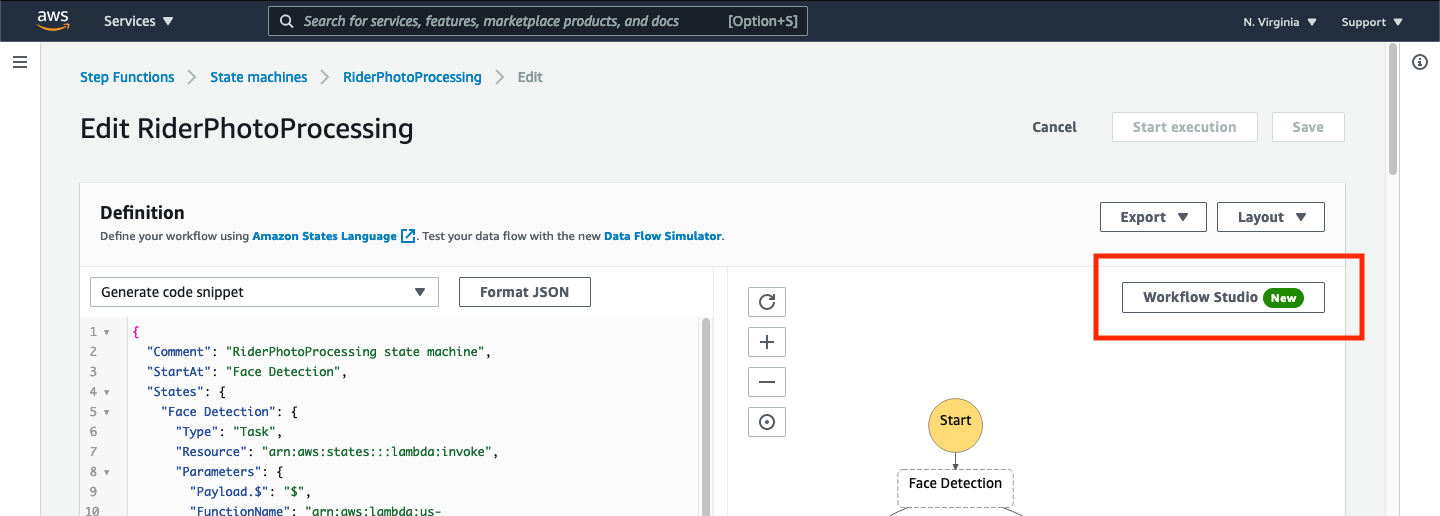
➡️ Step 1: Edit your state machine by returning to the Workflow Studio.
➡️ Step 2: Add the DynamoDB native integration step.
Drag the DynamoDB PutItem action from the “States browser” and drop it in between the Parallel State and End states. When done, you should see that the “Configuration panel” has changed to allow configuration of the DynamoDB PutItem step as shown below.
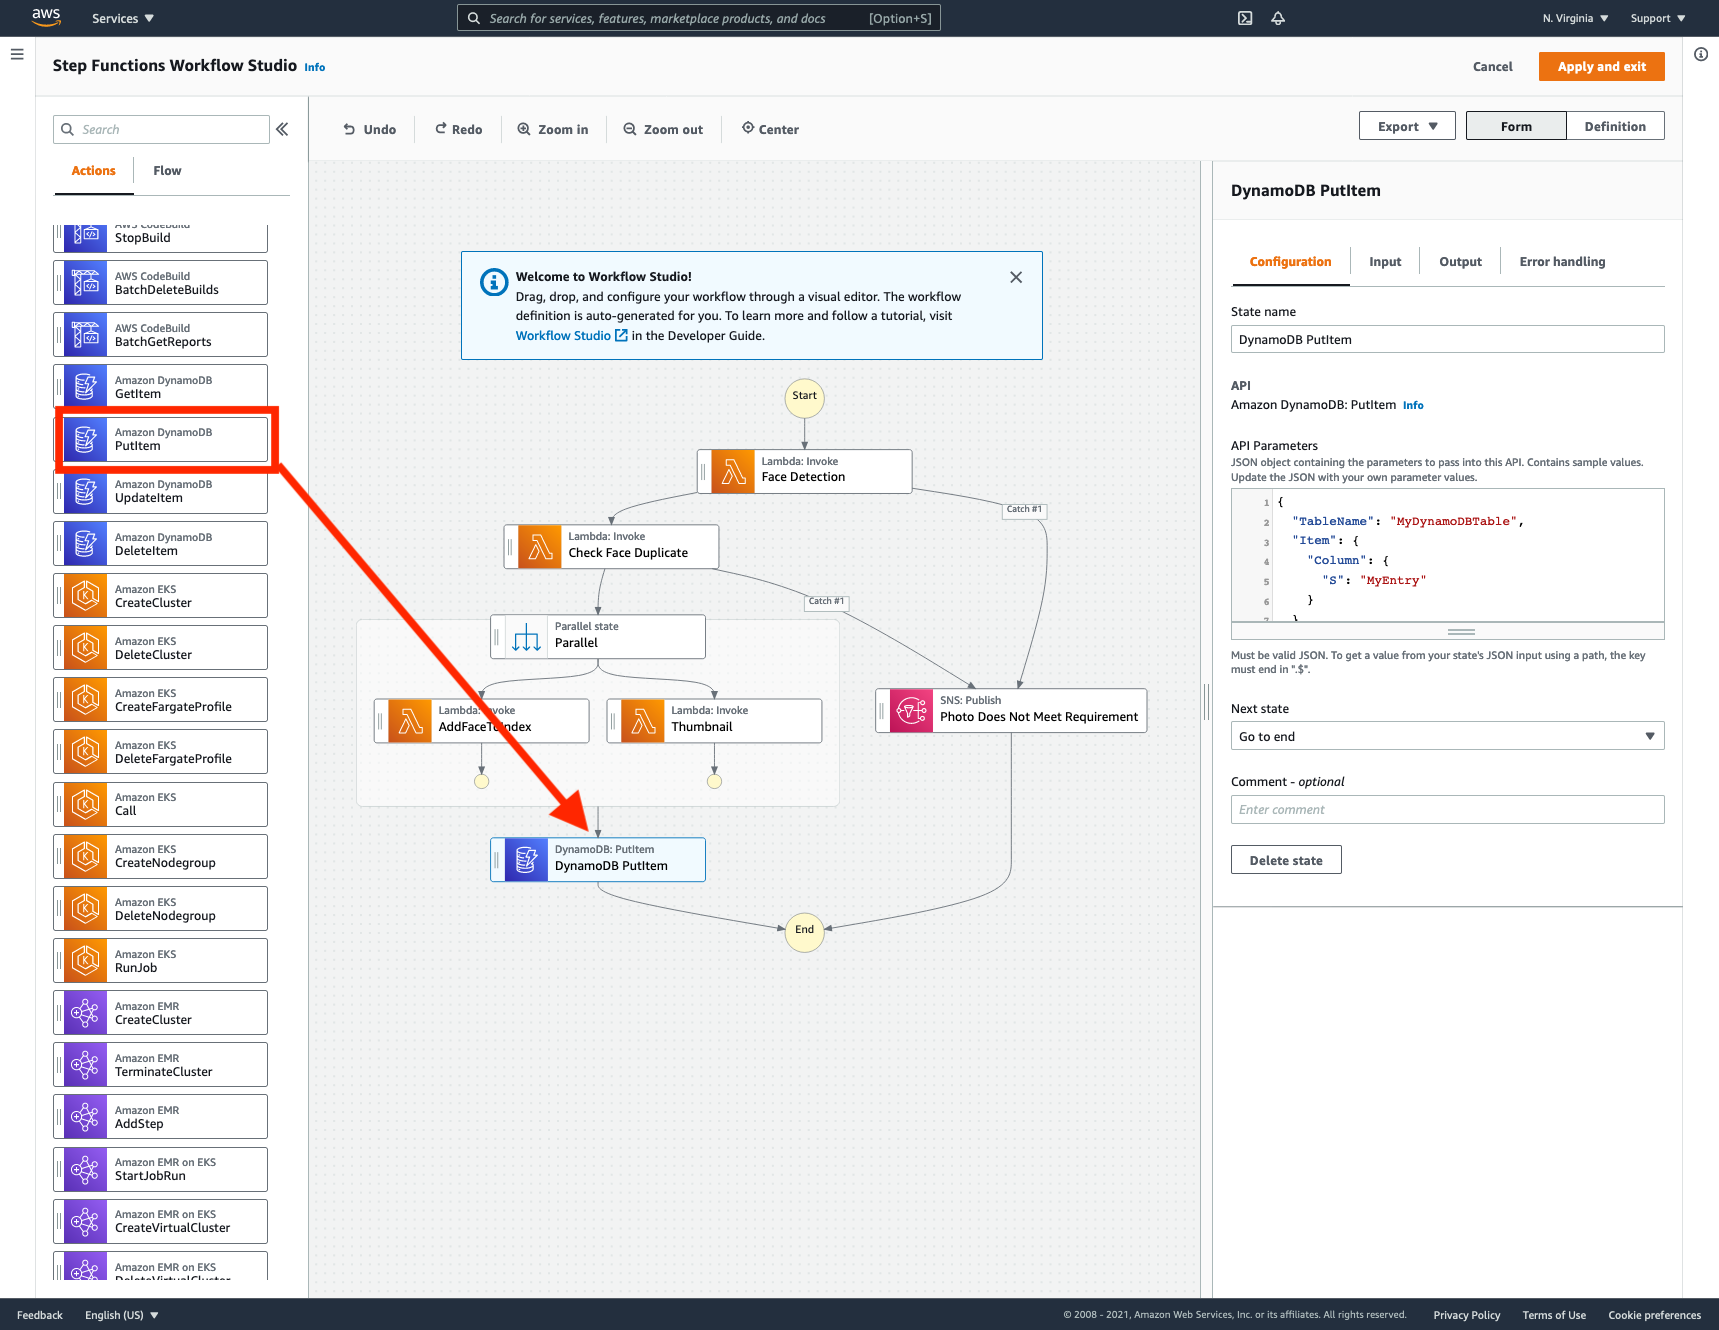
➡️ Step 3: Configure the newly created state.
Change the state name to PersistMetadata. Then, in the API Parameters section, copy in the following JSON.
Make sure to substitute the REPLACE_WITH_RiderPhotoDDBTable with the value of the RiderPhotoDDBTable value of the output from the CloudFormation stack.
{
  "TableName": "REPLACE_WITH_RiderPhotoDDBTable",
  "Item": {
    "Username": {
      "S.$": "$.userId"
    },
    "faceId": {
      "S.$": "$.parallelResult[0].Payload.FaceId"
    },
    "s3bucket": {
      "S.$": "$.s3Bucket"
    },
    "s3key": {
      "S.$": "$.s3Key"
    },
    "thumbnail": {
      "M": {
        "s3bucket": {
          "S.$": "$.parallelResult[1].Payload.thumbnail.s3bucket"
        },
        "s3key": {
          "S.$": "$.parallelResult[1].Payload.thumbnail.s3key"
        }
      }
    }
  }
}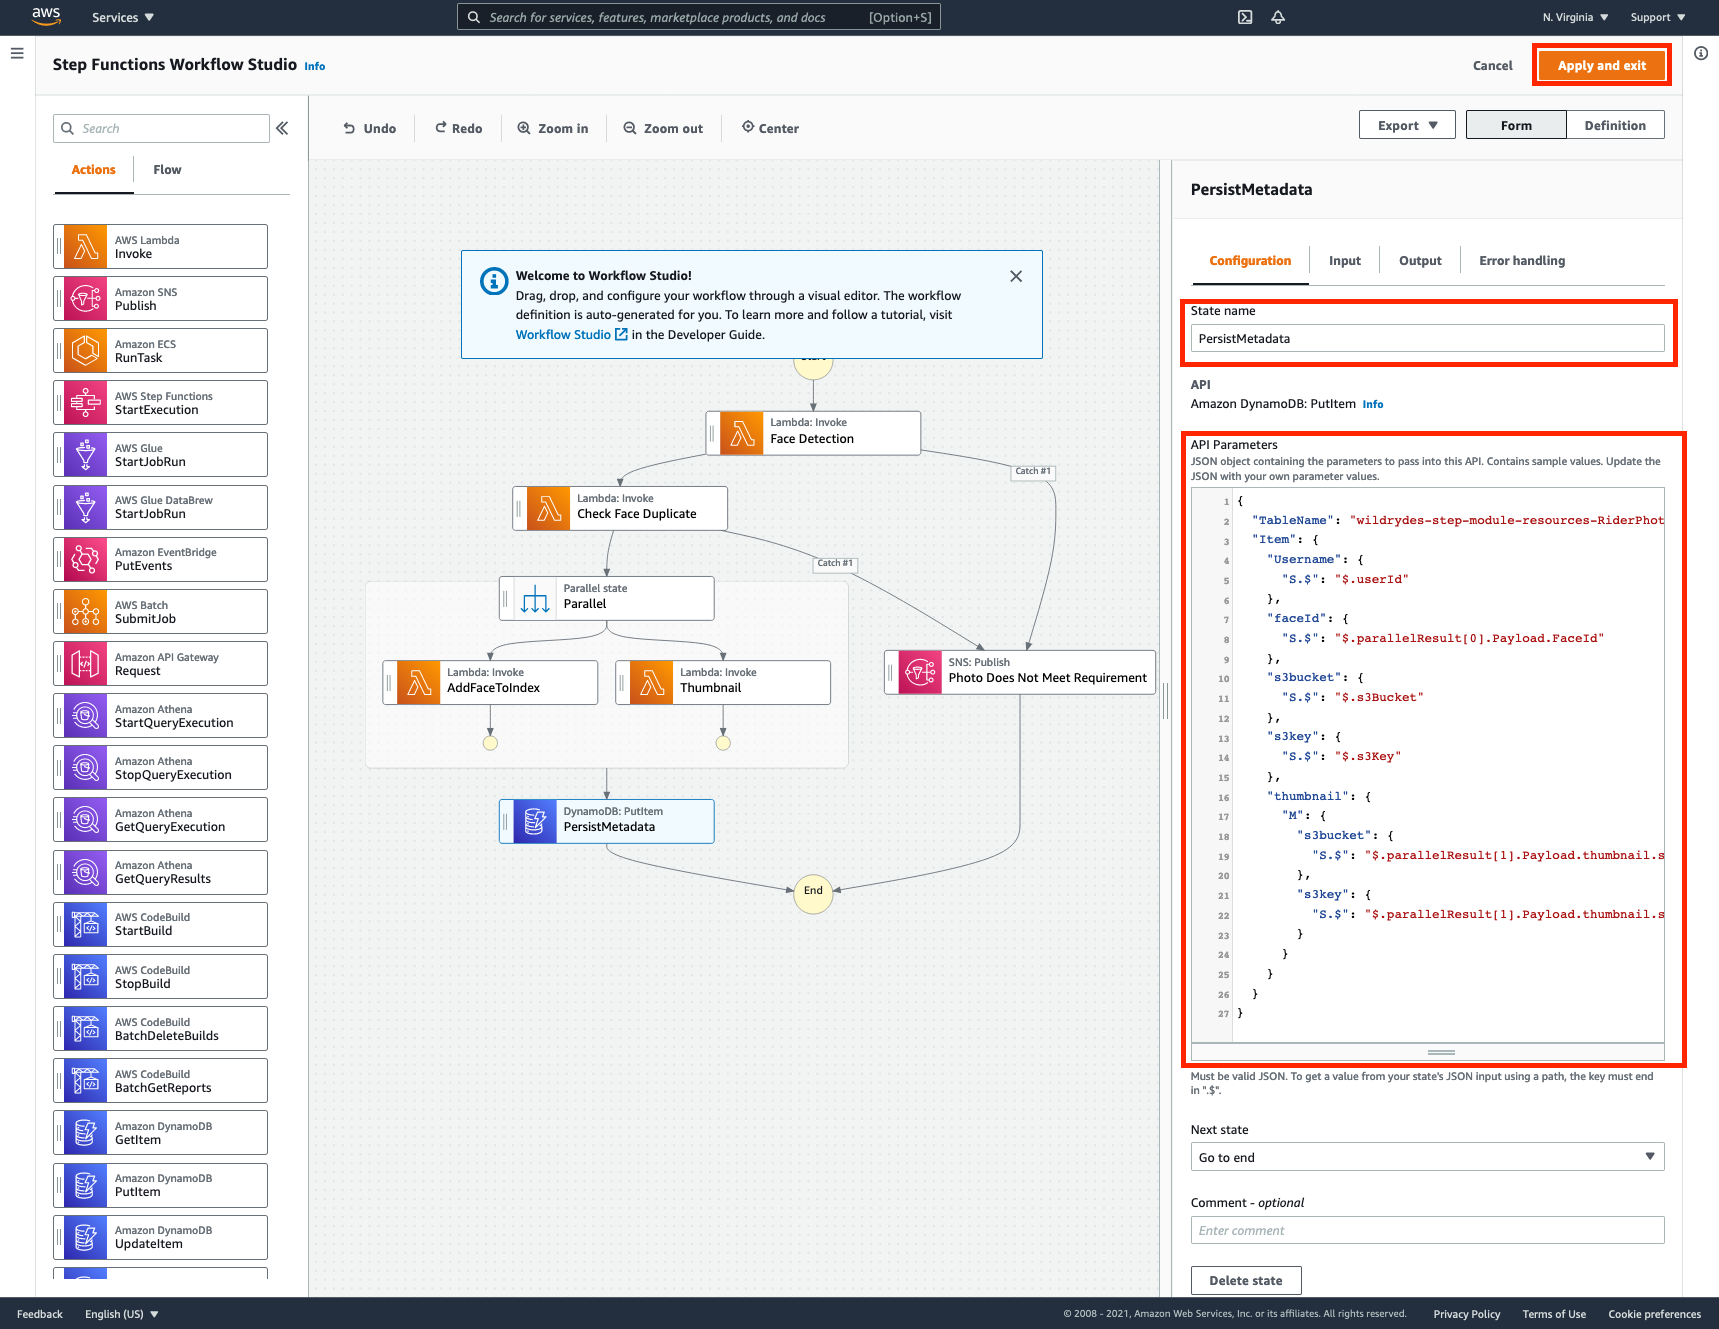
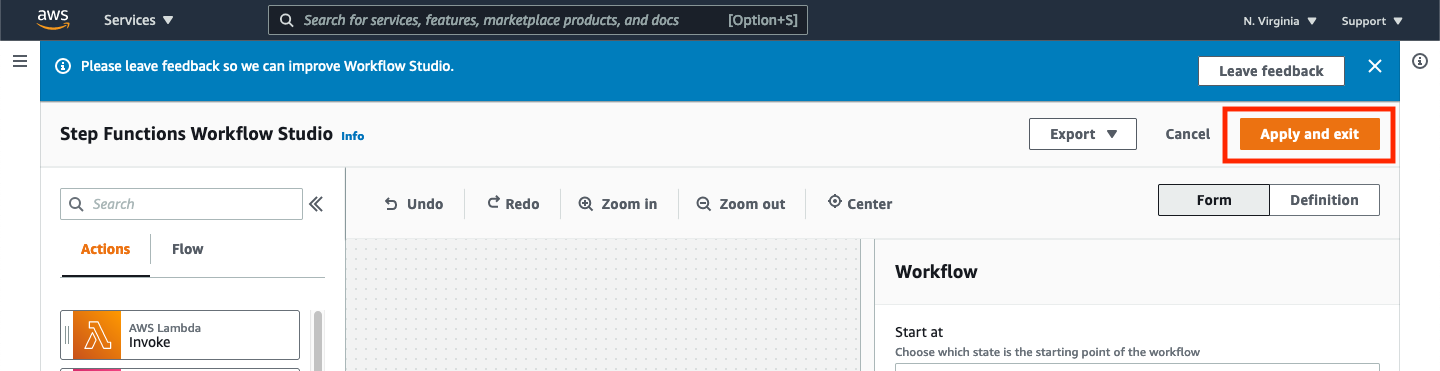
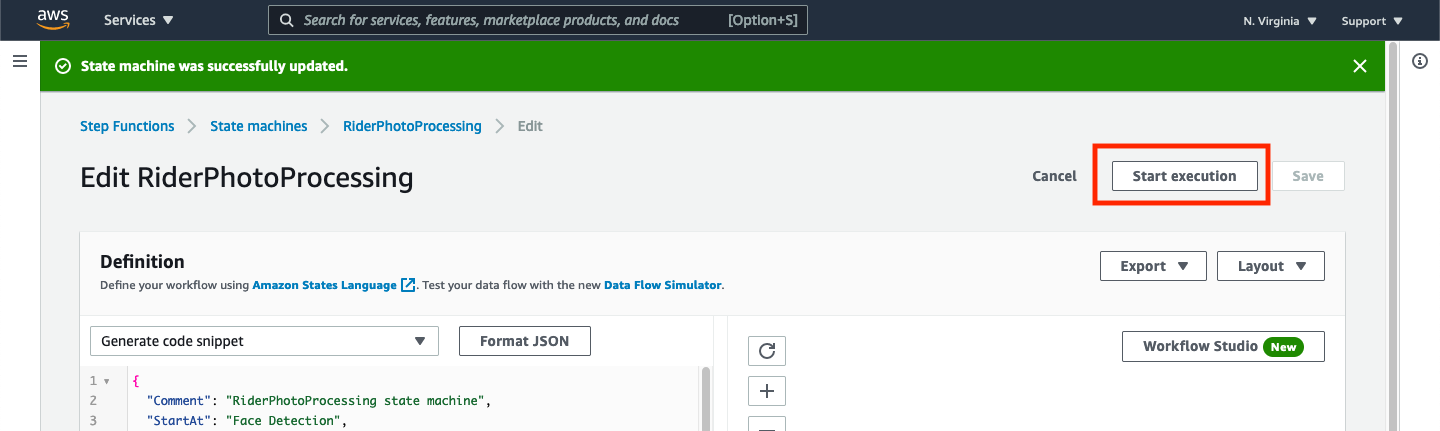
➡️ Step 4: Save your changes.
Click Apply and exit in the top right of the window to apply all changes and return to the state machine definition page.
To save the changes you made, you must also click the Save button in the top right of the state machine definition page.
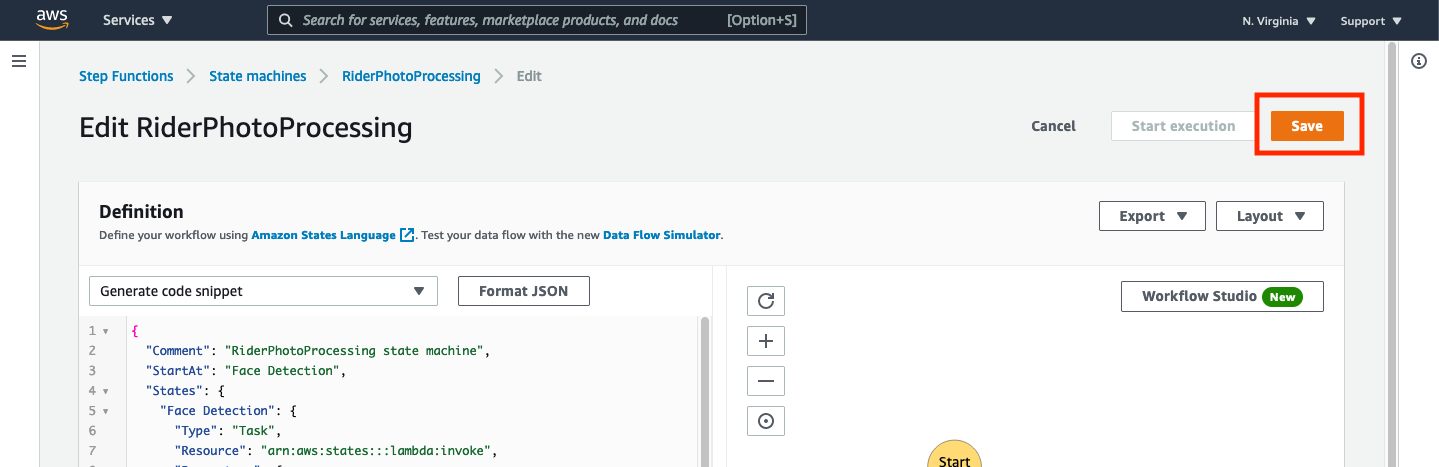
Saving changes to the state machine made using the Workflow Studio interface requires both applying the changes (to leave the Workflow Studio interface) and pressing the Save button once you have exited the workflow interface. If you fail to do either of these steps, the changes made to the state machine will not be saved.
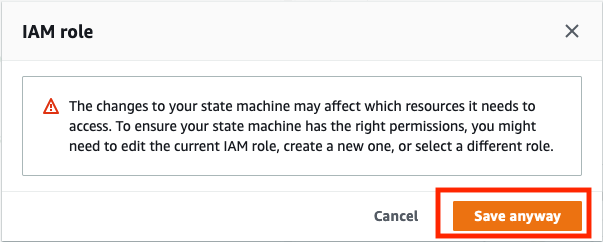
You may get an alert dialog when saving informing you that your changes may affect the resources the state machine needs to access. Click Save anyway.
You should get a confirmation that your state machine was successfully saved and the result should look like the following:
Testing our implementation
Now that we have built the persist metadata state, let’s test our implementation by executing it with some sample input. Before testing, we need to delete and recreate face collection in Amazon Rekognition.
From this point on, you should use the following two commands (to be run from the Cloud9 IDE) when testing your state machine:
Deleting face collection
    aws rekognition delete-collection \
        --collection-id rider-photos \
        --region REPLACE_WITH_YOUR_CHOSEN_AWS_REGION
Creating face collection
    aws rekognition create-collection \
        --collection-id rider-photos \
        --region REPLACE_WITH_YOUR_CHOSEN_AWS_REGION
These commands simplify resetting your collection so that you can reuse the test images provided with different parameters for testing.
➡️ Step 5: Return to the AWS Console where you left off, you can click the Start execution button in the top left of the screen.
This will open a dialog where you can put your input data. For the input data, copy in the following JSON.
{
"userId": "user_a",
"s3Bucket": "REPLACE_WITH_YOUR_BUCKET_NAME",
"s3Key": "1_happy_face.jpg"
}
Paste it into the input field and make sure to substitute the REPLACE_WITH_YOUR_BUCKET_NAME with the value of the RiderPhotoS3Bucket value of the output from the CloudFormation stack.
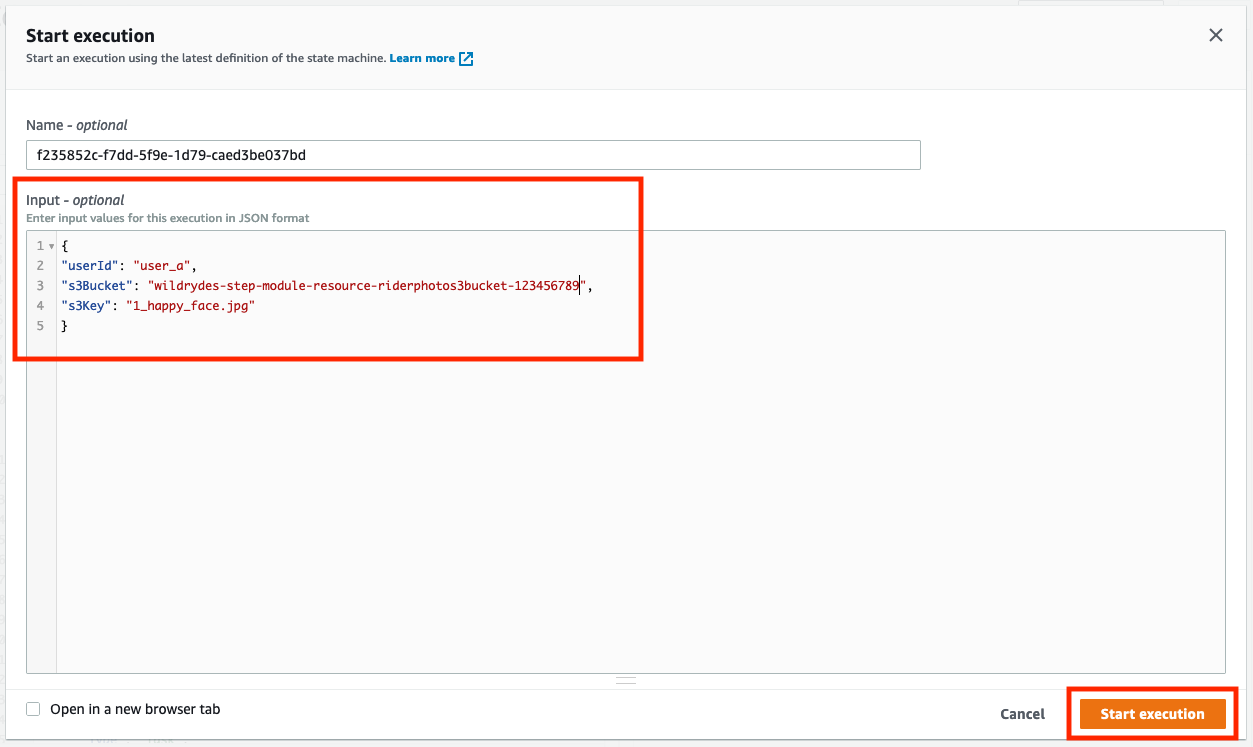
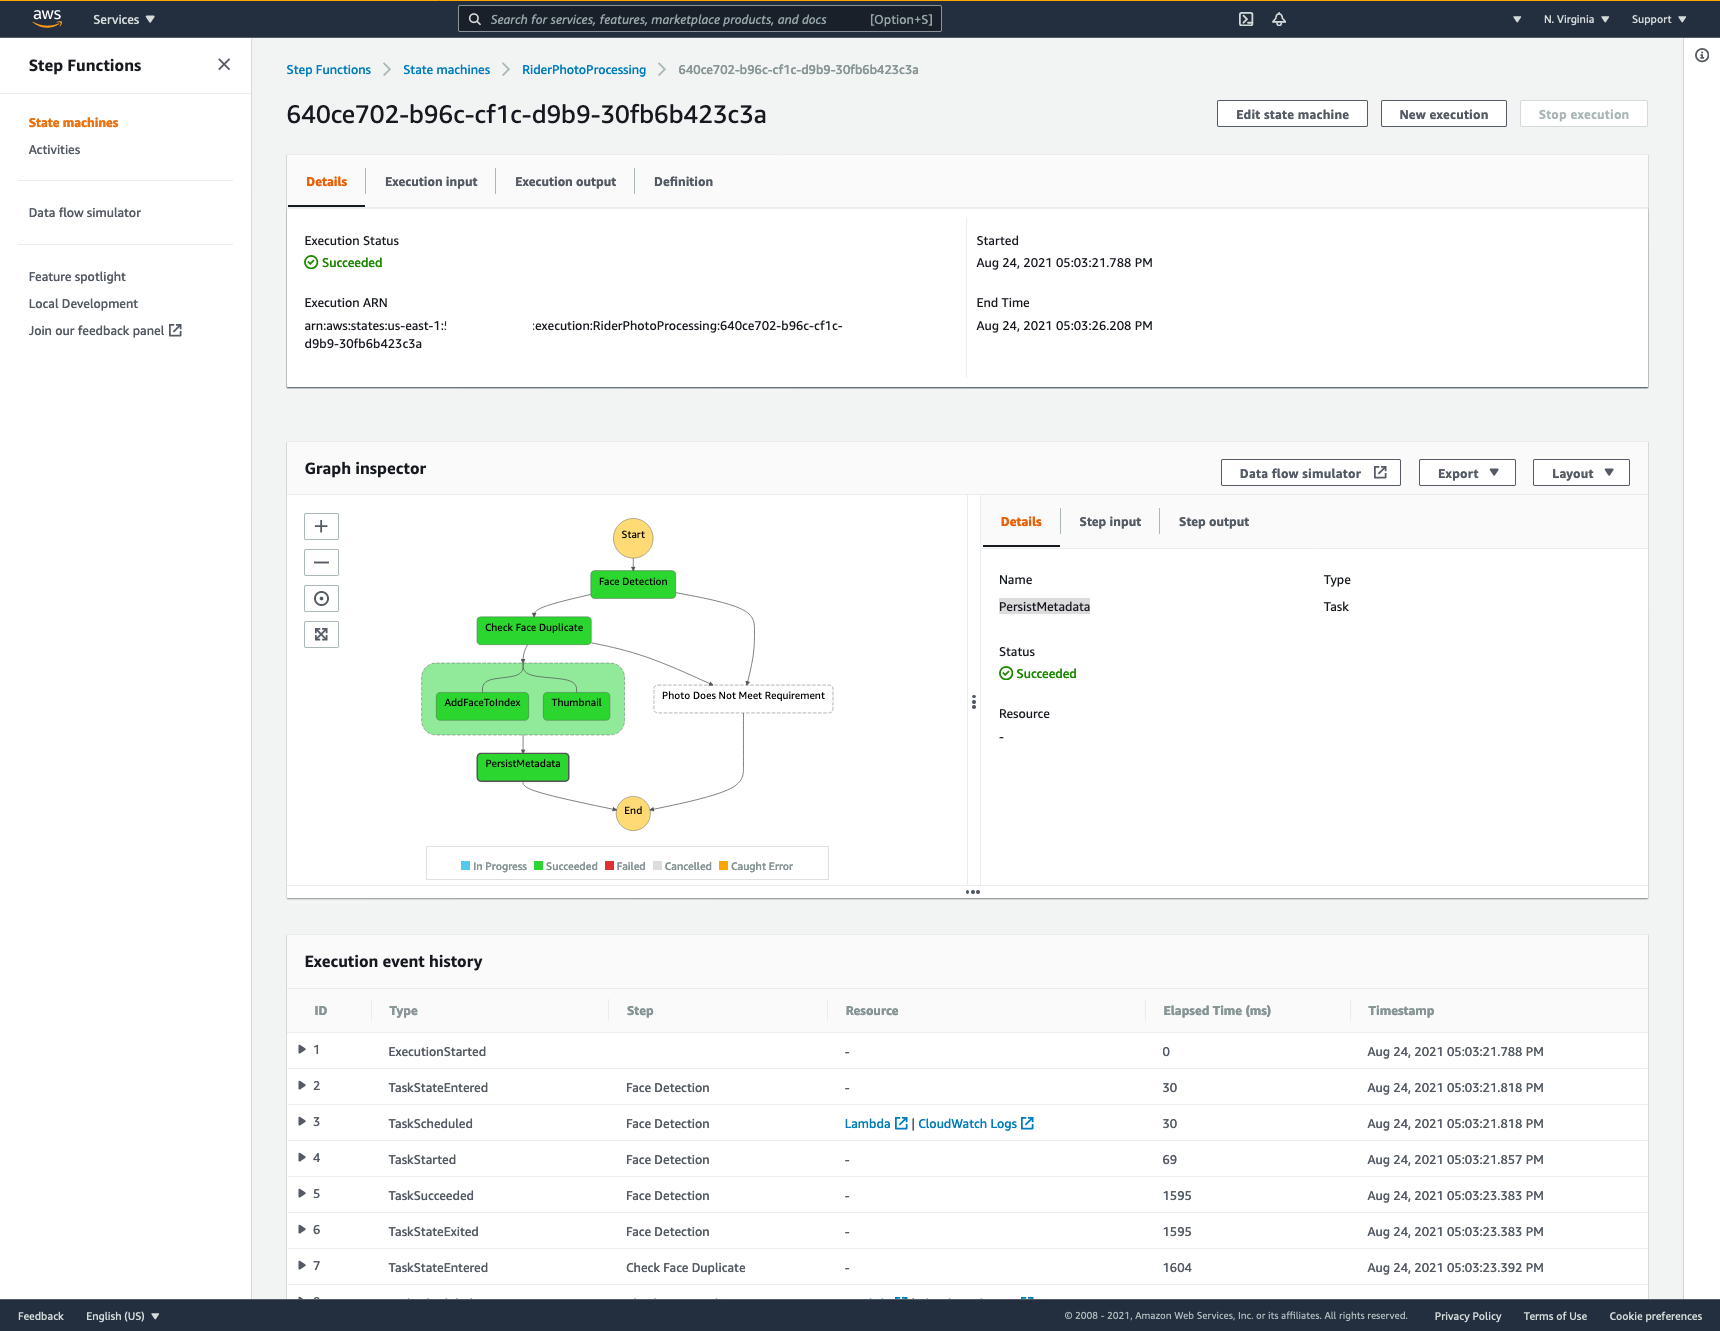
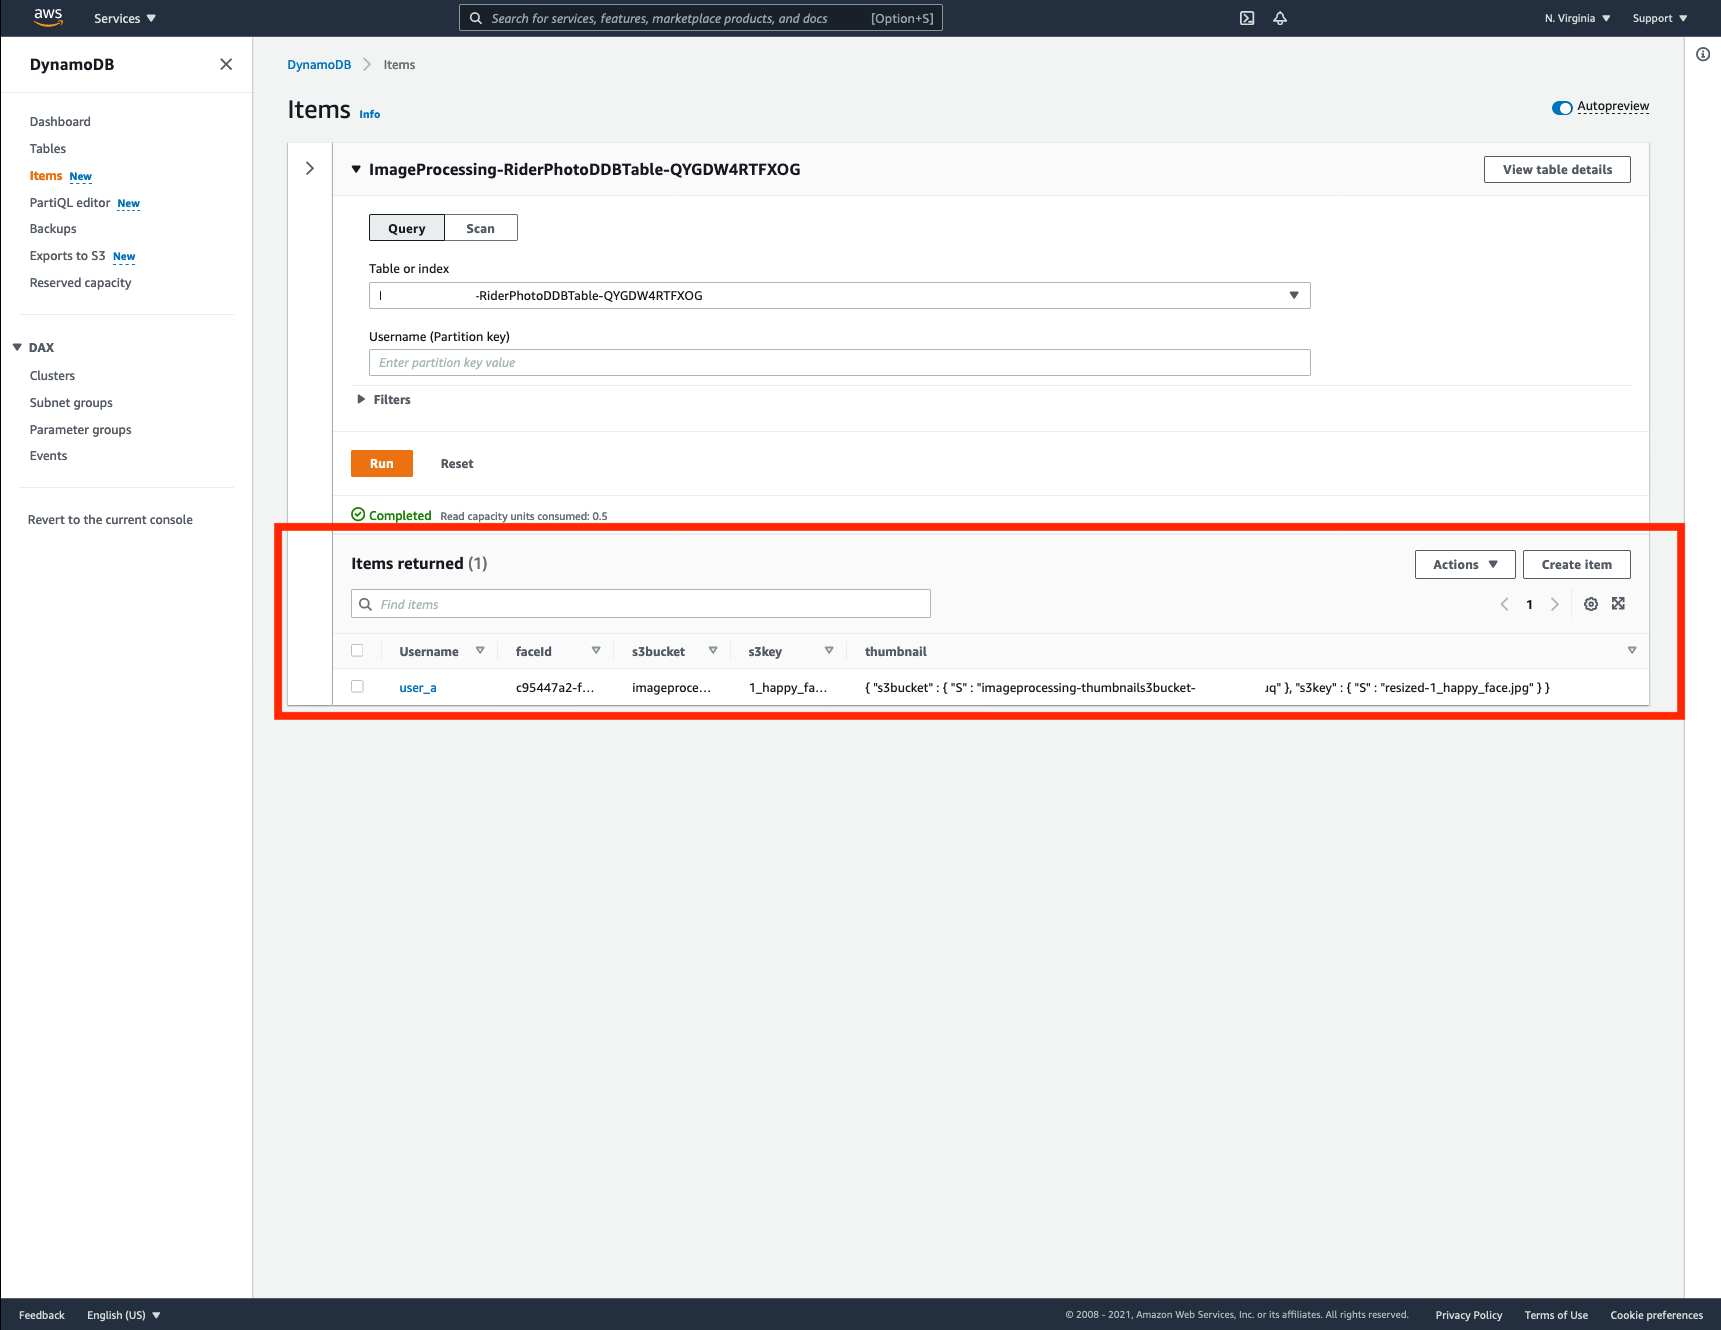
Once you’ve replaced the s3 bucket with the RiderPhotoS3Bucket value from the output of your CloudFormation stack, press Start execution. This will start the execution of your step function and take you to a status page for the execution. If things go well, you should see an execution status of Succeeded and the graph inspector should have a green PersistMetadata state.
Now, we are going to validate that user profile metadata stored in the DynamoDB table.
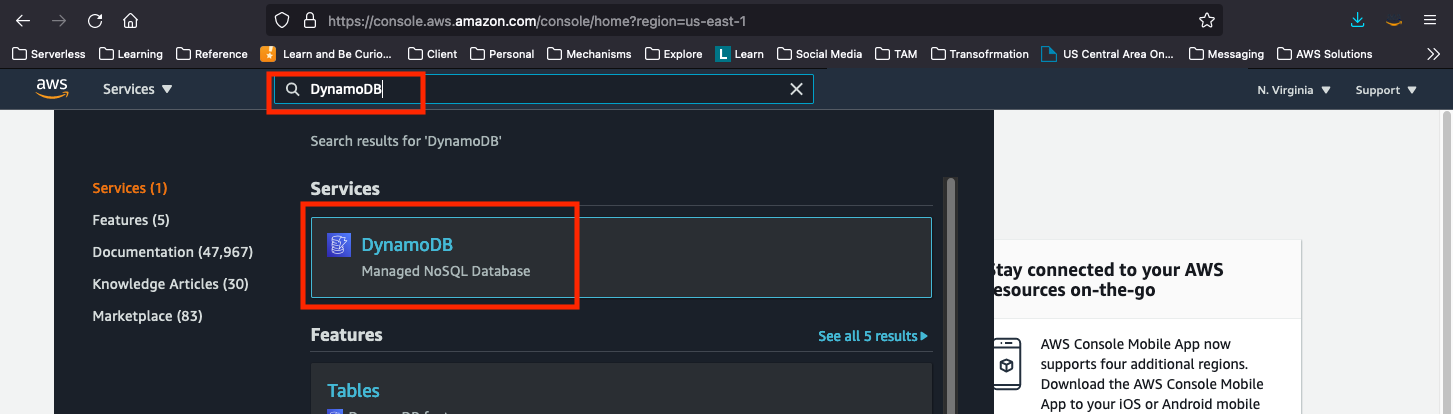
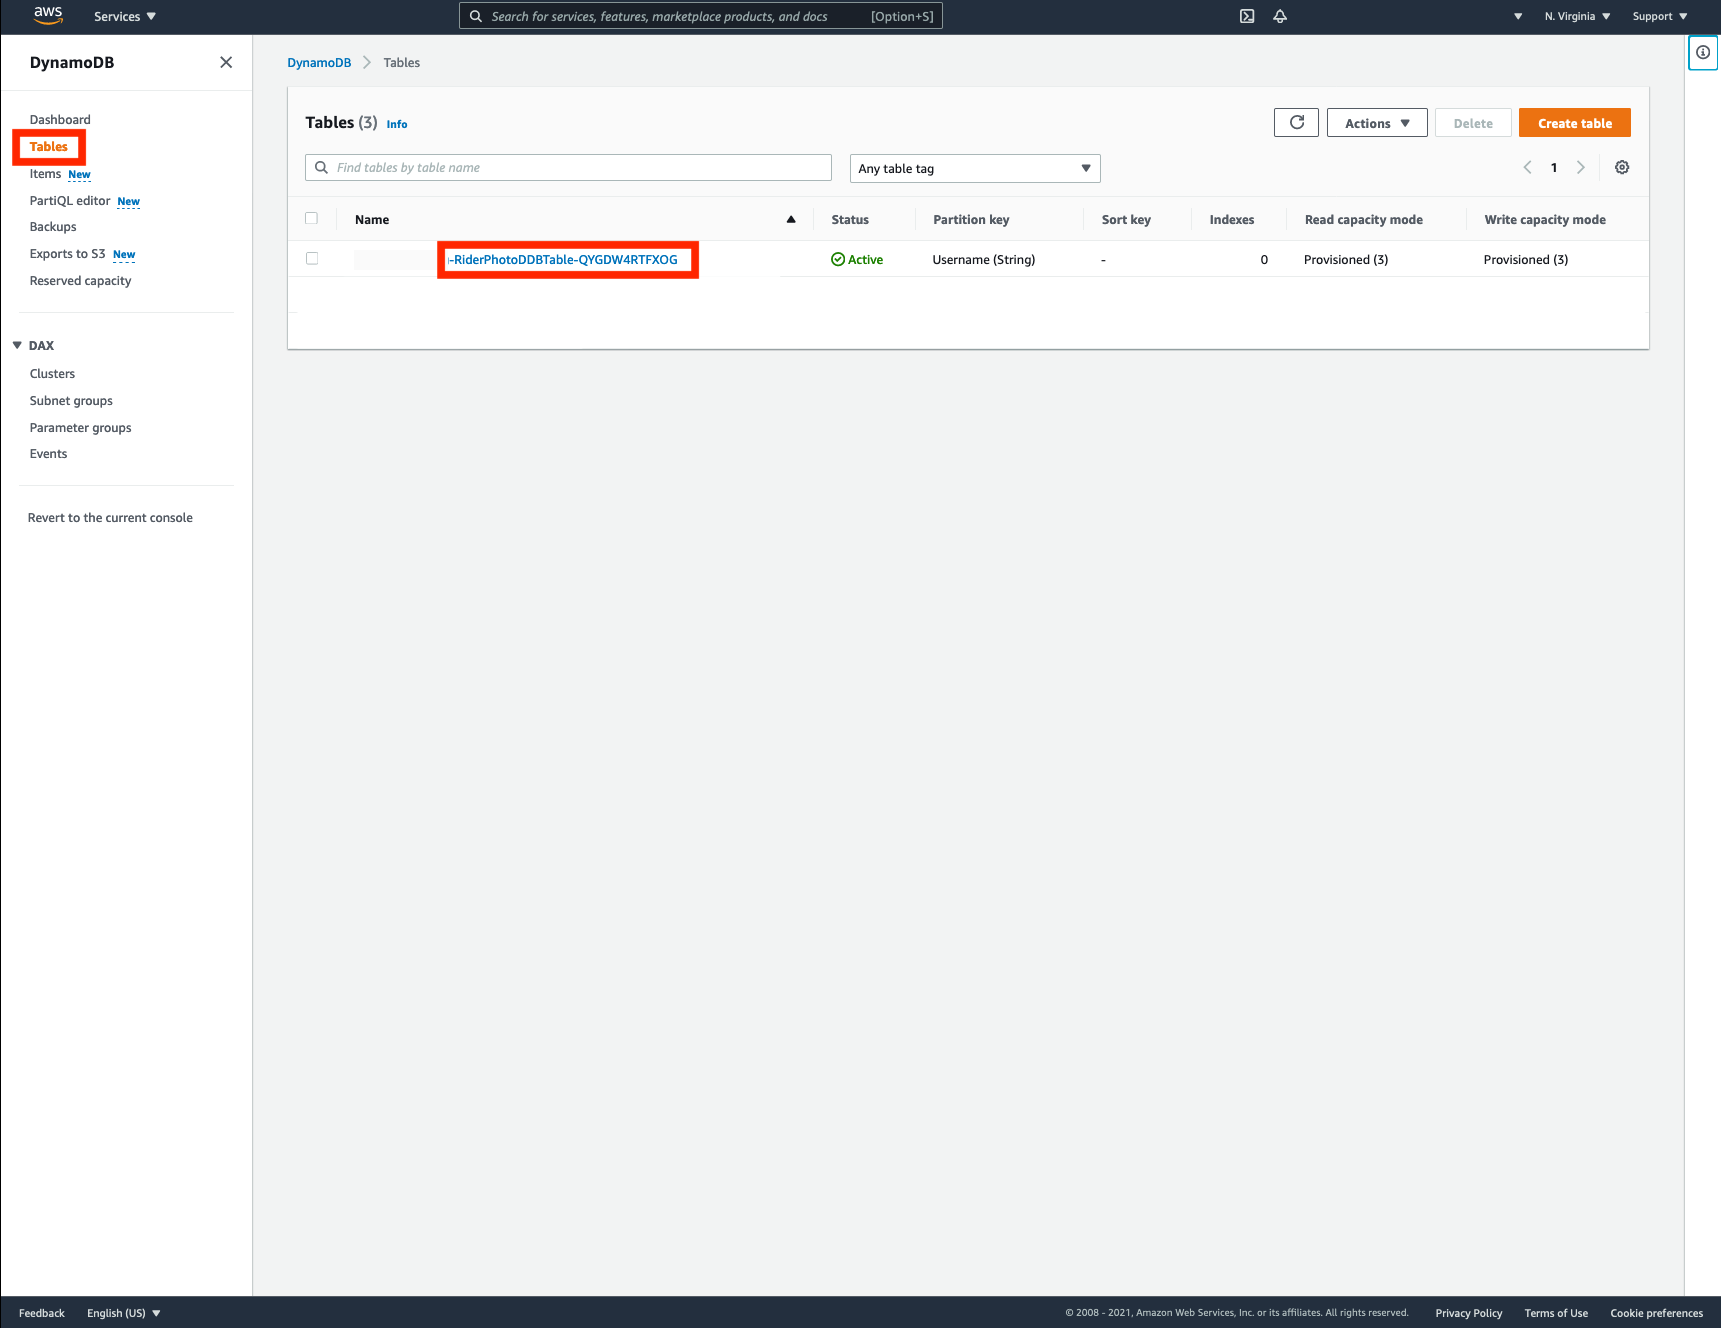
➡️ Step 6: Navigate to the DynamoDB dashboard.
From the AWS Management Console, type “DynamoDB” in the search field at the top of the window and select DynamoDB from the list of services.
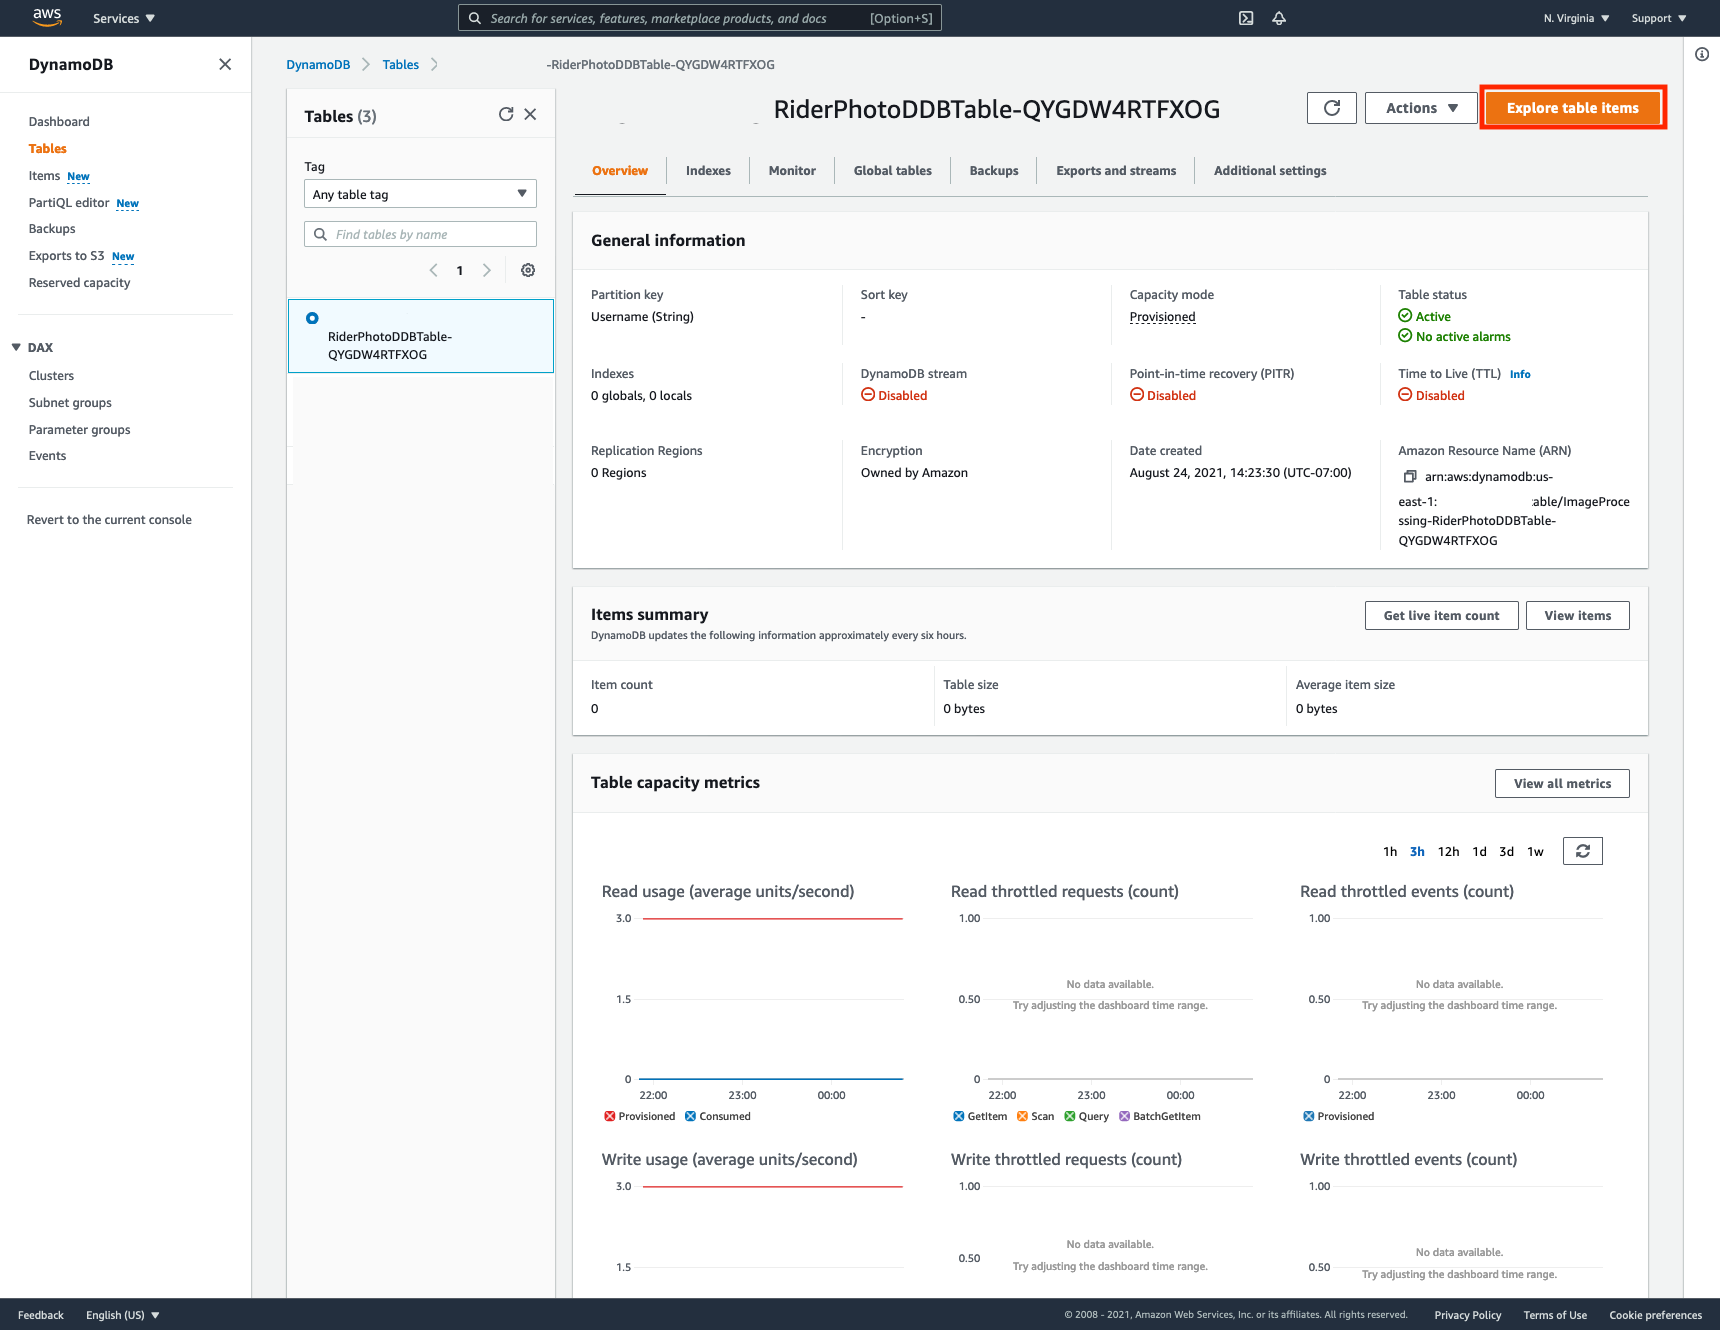
➡️ Step 7: View the table items.
Click on Tables, then find and click on table wildrydes-step-module-resources-RiderPhotoDDBTable-XXXXX. Then, click on Explore table items.
✅ Congratulations! You have now tested and validated metadata persistence step.